Face Painting is always the most popular activity at parties or festivals. Almost a rite of passage for many children, the memories your face paint evokes are palpable.
As soon as my line opens I’m always busy as children and adults want their faces painted.
We have a huge range of Sensory and behavioural diagnoses in our family. My husband, at 44 years has only just been diagnosed as autistic! I’ve 4 nephews who are diagnosised as autistic, ADHD, Social Misconduct Disorder and Development issues and have witnessed first hand how it effects not only the child but the parent.
Simply being invited to a birthday party can be daunting for the child and parent. Trying to navigate the social expectations whilst ensuring your child doesn’t become overwhelmed or distressed is really, really hard! Many have never had their face painted.
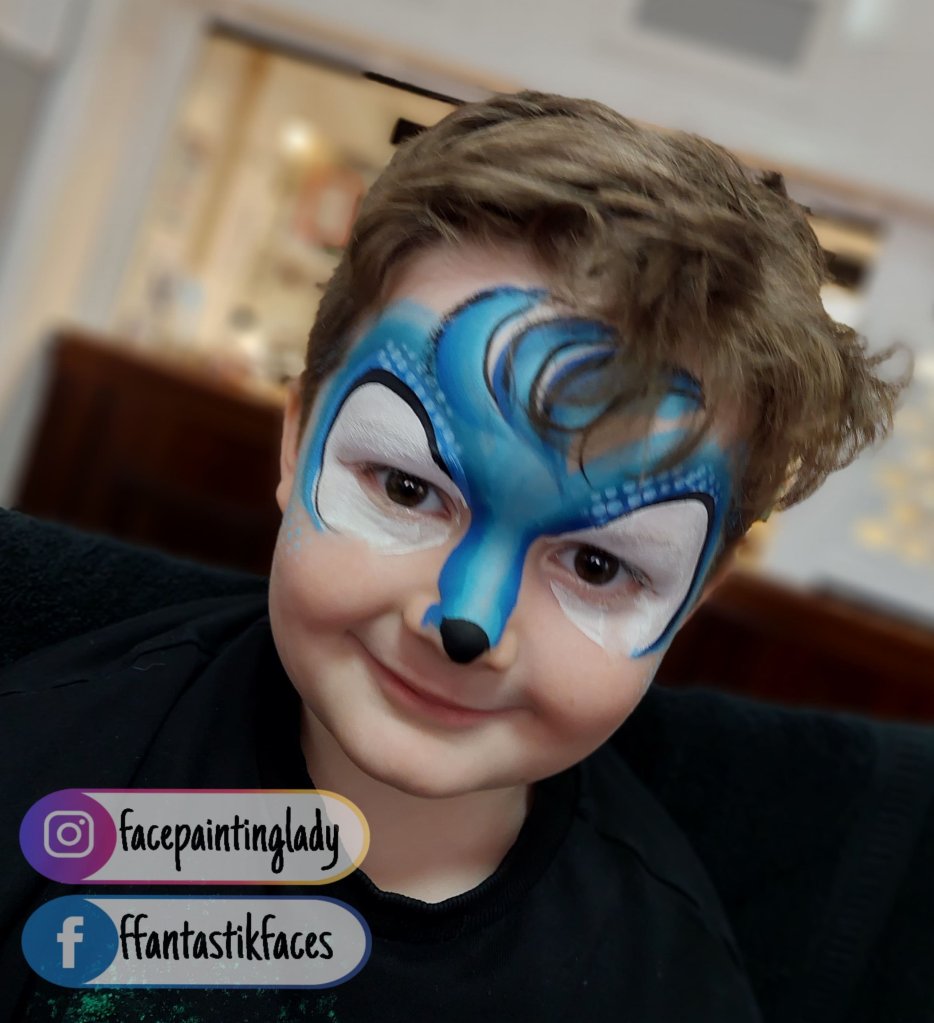
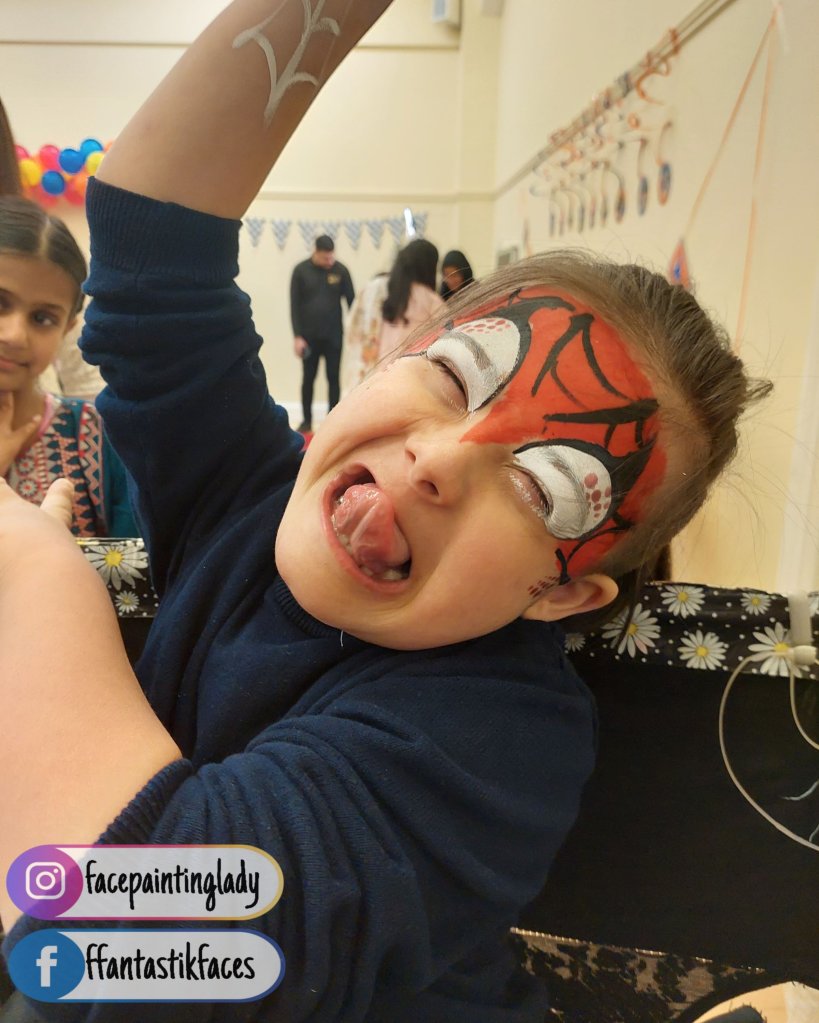
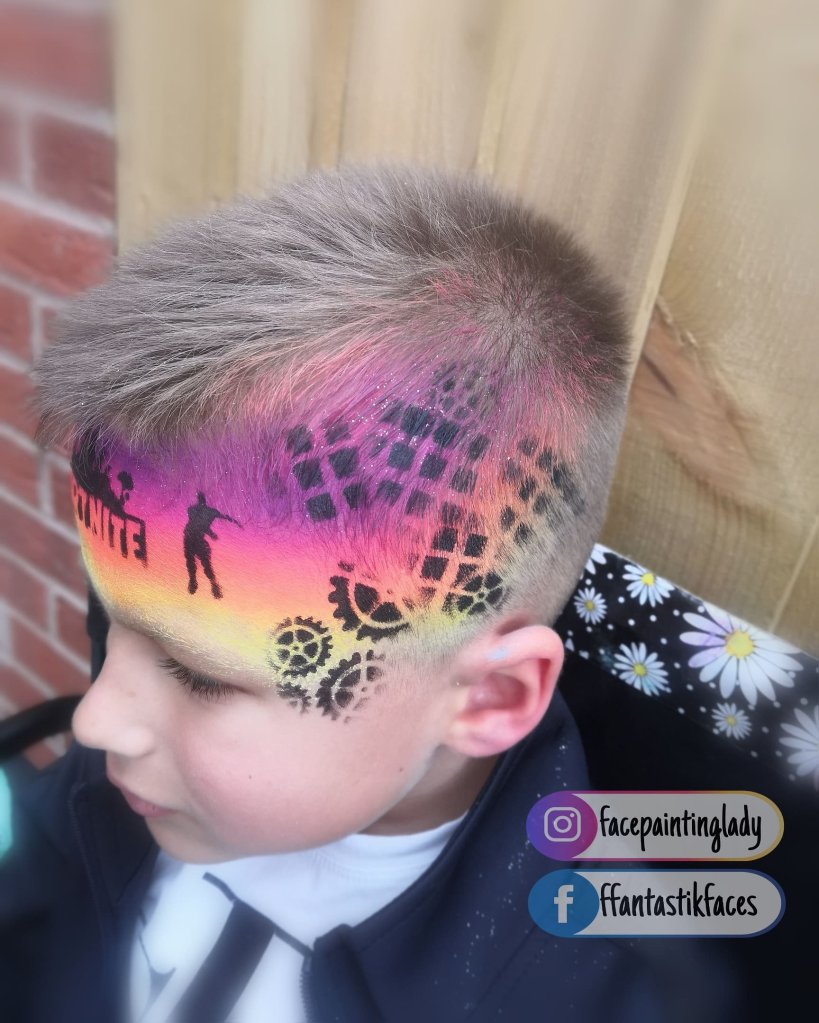
This young man had never had his facepainted. I see sloppy line work and bleeding on the teeth, but their parent and child were overwhelmed! When accommodating SENS children you need to concentrate on the experience and sensations they are feeling.
I usually identify if a child needs extra attention as they queue. There are certain sentences that grab my attention or the way the parent may be a little bit more apprehensive or nervous. Many times, the parent will tell me before the child climbs in the chair if they have any sensory or behavioural issues. Sometimes they don’t, and that’s OK too. Imagine feeling you had to introduce your child with “and he’s x, you and z”.
When a child sits in my chair and I feel they may have a sensory issue or even if they’re a little shy or nervous I follow a few steps that instantly help to put them at ease.
Slow Everything Down
Even if my line is 30 deep, if a child or adult is presenting as particularly nervous or displaying signs of discomfort I simply take my time!
Ask their name, if they’ve had their face painted before. (So many times I’ve heard “no, I don’t like the feel of it” Ask what shows they like, hobbies etc. I’ve created some fab designs where we’ve created a new pokemon or created a butterfly in their football team colours!
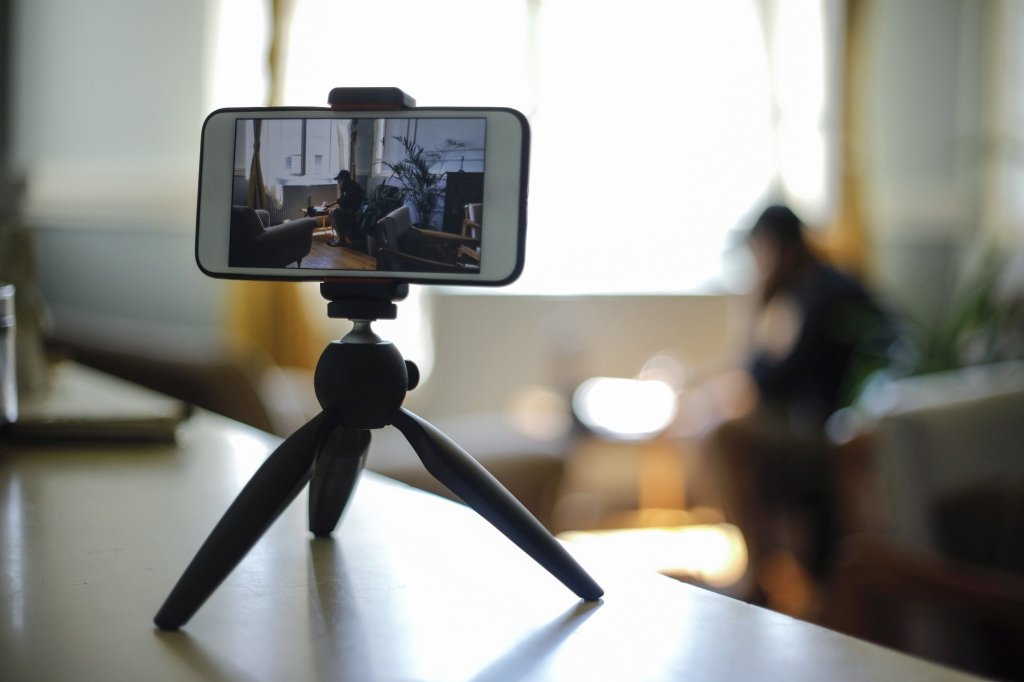
Consider The Position Of Your Chair
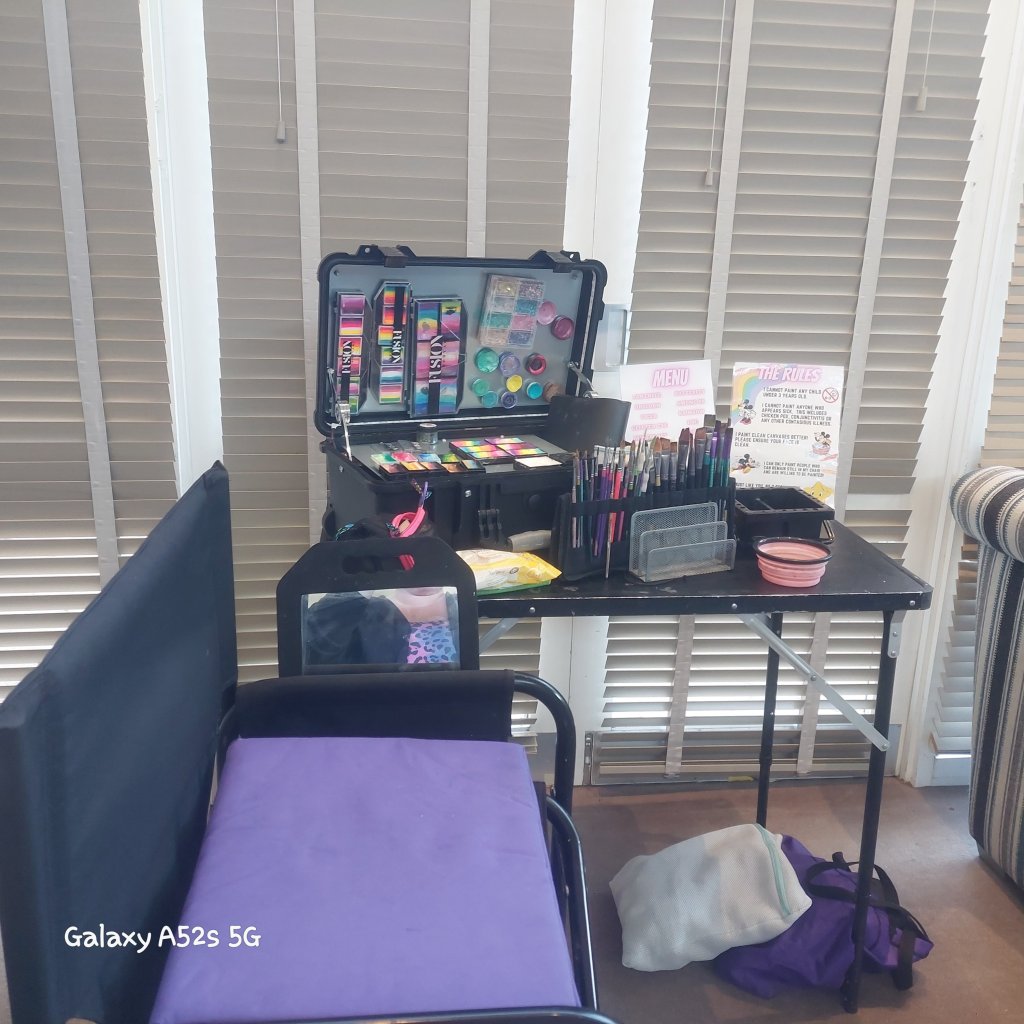
I usually have my chair on a side setting, so the queue can watch me paint. They love seeing the whole process!
I usually have my chair half facing the line, as in the picture. I find this keeps the queue entertained as they watch the whole process, and I get to keep an eye on the queue as I’m working.
With particularly nervous children, it will serve you well to move the chair, so the back is facing the line. This way the interaction between you and client is alot more personal. Many times, children queue for a long time, only to sit in the chair, freeze as they see so many eyes looking at them, and jump straight out. It’s like being on a stage almost. So simply pivoting the chair can really help!
Explain Your Steps
My husband is very analytical and likes to know what is expected all the time! He does not like the unknown.
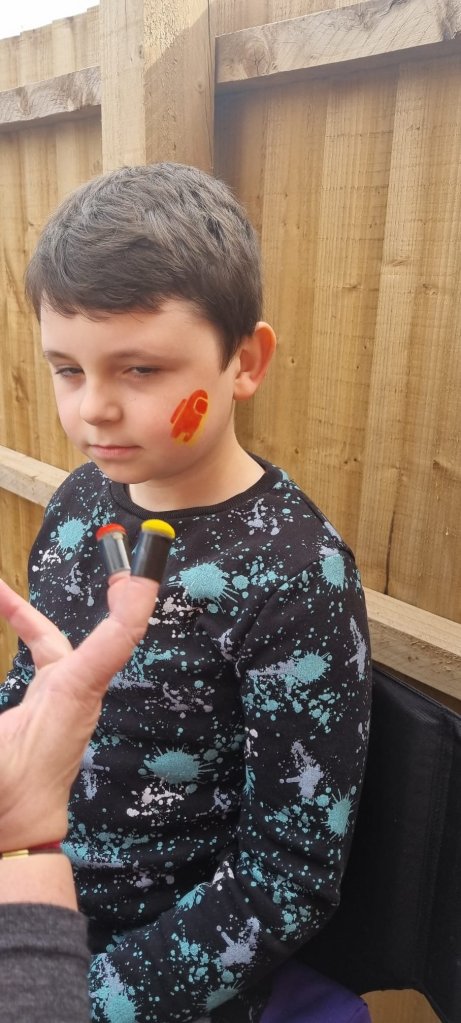
Here, I am explaining to my nephew that I’ll be using teeny sponges and showing him the colours I’m using.
So when they sit in my chair, once a design is chosen, I select all the colours, sponges and brushes I’m going to use. Say, if it’s Spiderman, I explain I’ll need white for his eyes, red for his face, and that I’ll be using sponges. I then show them the sponges. I then explain I’ll be using this brush for the webs. This really helps alleviate some anxiety.
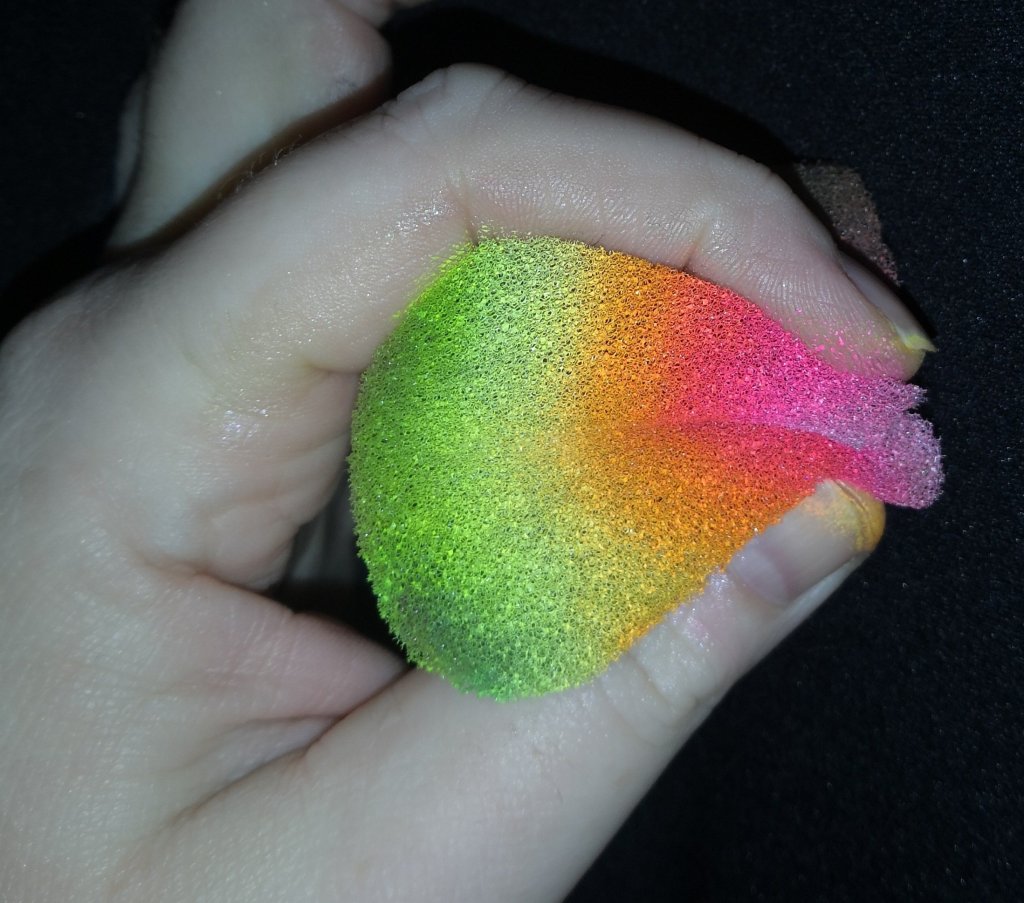
A Sponge is Not Just A Sponge!
Often, as I’m explaining my intentions, I’ll hand them a clean Sponge. This is for a few reasons. Firstly, they get to acclimatise to the feel of the sponge. Once, they do, I sometimes spritz it so they know what to expect. I often sponge firstly onto the back of their hand, too, so they aren’t shocked by the pressure they’ll feel on their faces.
The sponge becomes a stress ball of sorts for them. A fidget toy. Once the design is complete I’ll pop it in my dirty sponge bag to sanitise at home.
Warm Water Is A Win!
Whenever possible I use warm water to Paint. I began doing this as I noticed it speeded up my activation process, but continue to do so as it is simply nicer for the client!
Autistic children and adults do not like extremes. Cold water on their skin can be quite distressing and cause them to feel overwhelmed. Don’t forget, this is a whole new process for them. They’re taking many, many things in. Trying so many new things that were on the edge of a sensory overload. Warm water will help us not to fall off that ledge!
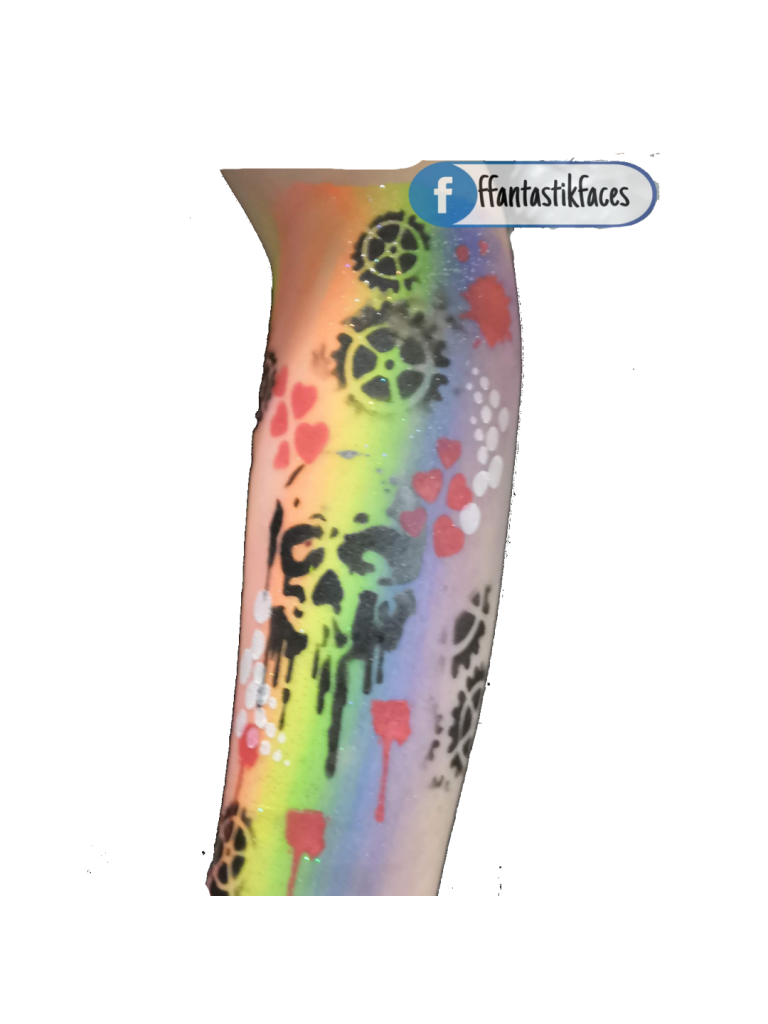
If a child really is struggling, an arm painting may be a better option. They can watch you as you paint and instantly feel more in control.
KISS
Keep it simple! As artists we’ve practiced our designs over and over. Experimenting with stencils to add depth and adding sparkles and glitter to make it shine. That stuff is what makes us happy! I guarantee you, the parent stood next to you is beyond happy that you’ve created spiderman, they don’t see the missing stencil work or glitter. They see that you’ve created this special memory for their child who normally won’t even look at a face painter! That’s enough.
Here is a basic Spiderman. The child will lead you. Sometimes they’ll be OK with some stencilling, but you’ll know when enough is enough because they’ll let you know!
Drying Issues
Particularly sensitive children may experience tightening of the skin. This could be reaction to your paints and shouldn’t be ignored. Removal with soap and water should be done by the guardian immediately. Never baby Wipes.
But, I am aware of children who don’t like the feel of the paint drying. This is because as the water evaporates, the paint particles adhere to the skin and they feel a “tightening” sensation. Any new and alien sensation is difficult to comprehend for some children, so I’m always aware of this too.
To combat this, bases are usually glycerin based and loaded onto the skin with sponges.
Job Satisfaction At It’s Best!
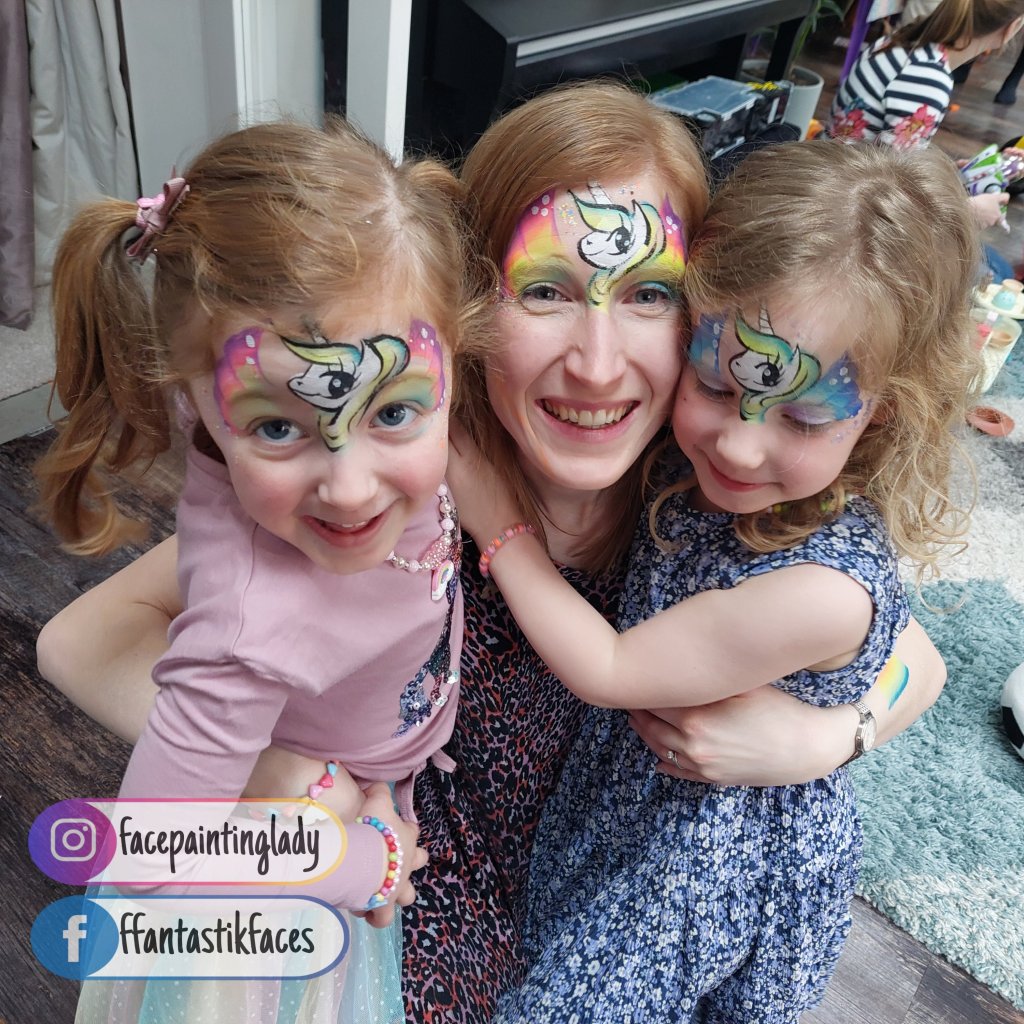
Having a parent turn to you in tears, thanking you for that moment. A child at 8 years finally having a face paint they love stare in wonder in your mirror. A Grandparent hugging you as they don’t feel like a failure anymore. A Dad overwhelmed because, for the first time ever, their child had joined in. These are all things that have genuinely happened to me. This is why I simply love my job!
Facepainting often is a family activity and being able to include everyone in that family is a wonderful feeling!
I’ve found I probably work more hours now than I ever did as a Bank Manager!
I’ve been told by my friends and family what an easy and fun job I have. How it must be great to only work on the weekends, enabling me to have my week days free……… I just smile. The truth is I probably work more hours now than I did as my previous job as a bank manager!
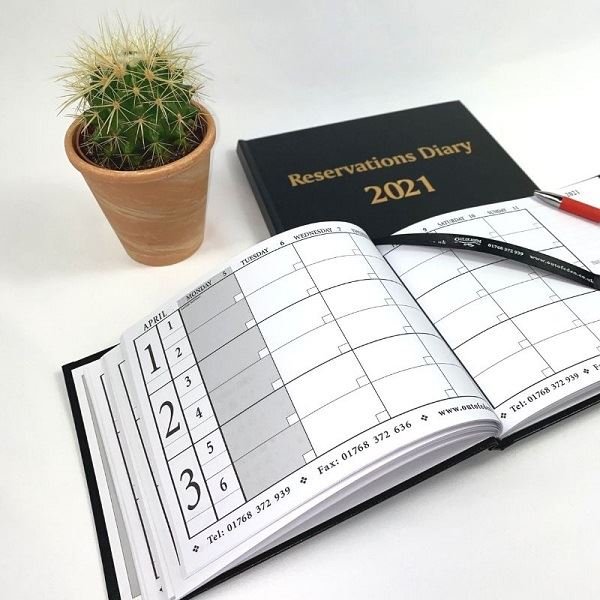
Monday – Time To Catch Up!
My Monday’s are always pretty hectic. After getting the kids to school, I’ll settle down at the dinning table (usually once I’ve cleared it of breakfast pots, pj’s, socks, hair bobbles and any other piece of junk that didn’t find its rightful home. ) to go through my weekend’s work.
First things first, any pictures I’ve taken of the client’s event I’ll go through and edit. I usually take 5 or 6 pictures of each child, so I ensure I’ve got a good picture of my work, so I’ll trawl through them and edit them, adding my watermark. These will be used throughout the week for my social media posts, advertising and contact with the families I’ve painted. The great thing with this, is once I’ve watermarked them and passed them onto the client, they will share the pictures with my watermark so I instantly get more exposure.
Once I’ve edited the pictures, I’ll review my previous Saturday and Sunday. I need to reach out to each party I’ve attended to thank them again for choosing me to paint at their event. I’ll include any pictures I’ve managed to take and ask the client if they’d be kind enough to leave a review of my services. This helps small businesses so much! Don’t be scared to ask. Include a link to your Google or Facebook page so you make it as easy as possible for the client. I’d say about half will find the time to write a brief review.
Once I’ve dealt with all of that I’ll select some pictures to post to my Instagram and Facebook pages. It’s important I keep my content fresh, up to date and on trend with any current events. I’ll use popular hashtags and events that may be happening that day. I do this every single day. So you’ll often see me on my phone!
Tuesday – Time to Advertise!
Alot of my work is secured by word of mouth and social media sites.
I usually advertise through Facebook. I secure possibly 80% of my work through this site.
I will create an ad on my business Facebook page. Just a few up to date pictures, with a brief description of what I offer. Once it’s been posted, I will share this to many if the local selling sites, parent sites and spotted pages.
My top tip for doing this, is to create a list of sites with the number of members in each, note any special instructions too, alot if sites only allow business posts on a specific day, or have a pinned post at the top, which you add your details to. This way you won’t be making a nuscience of yourself and wound up getting blocked.
By sharing an initial advertisement you can monitor how many people have seen your post or engaged further with your post. You may find you have more engagements at different times, so it’s worth changing the times you do this. Ask yourself when your target market is more likely to be browsing these sites? Make a note of each time you post and you’ll soon see a distinct pattern build up.
Wednesday – Check Your Up and Coming Bookings
I always look at my diary midweek, to see what I’m doing at the weekend. I’ll reach out to each client, with a friendly message, confirming all details. This helps immensely, as I often find that the amount of children attending may have changed, which if I’m able, means I can offer more time or plan designs to fit a theme.
Thursday – A Day To Make Social Media Content
I help run a very large facepainting help group on Facebook. It has close to 8,000 members, who often post questions and ask for advise in the group. As admin, it’s my job to check in daily and ensure everything is running smoothly.
On Thursdays, I set aside an hour or do to go live to interact with members and paint designs they may need help with. I often try new products out and discuss topics such as hygiene on the job, paint consistency or even how to book a job successfully.
By creating tutorials and lives, I’ve had to break down designs to bite sized chunks, this has really helped me as a painter, often researching more than I would initially if I were to paint alone.
I’ll often make a few 30 to 60 second videos for my Instagram as the light box is set up and my paints are in use. I found reels have helped my Instagram grow over the past few months.
Ofcourse, once I’ve done all this, I need to wash my brushes and clean my kit before I put it away. I find Thursdays are one of my busier days!
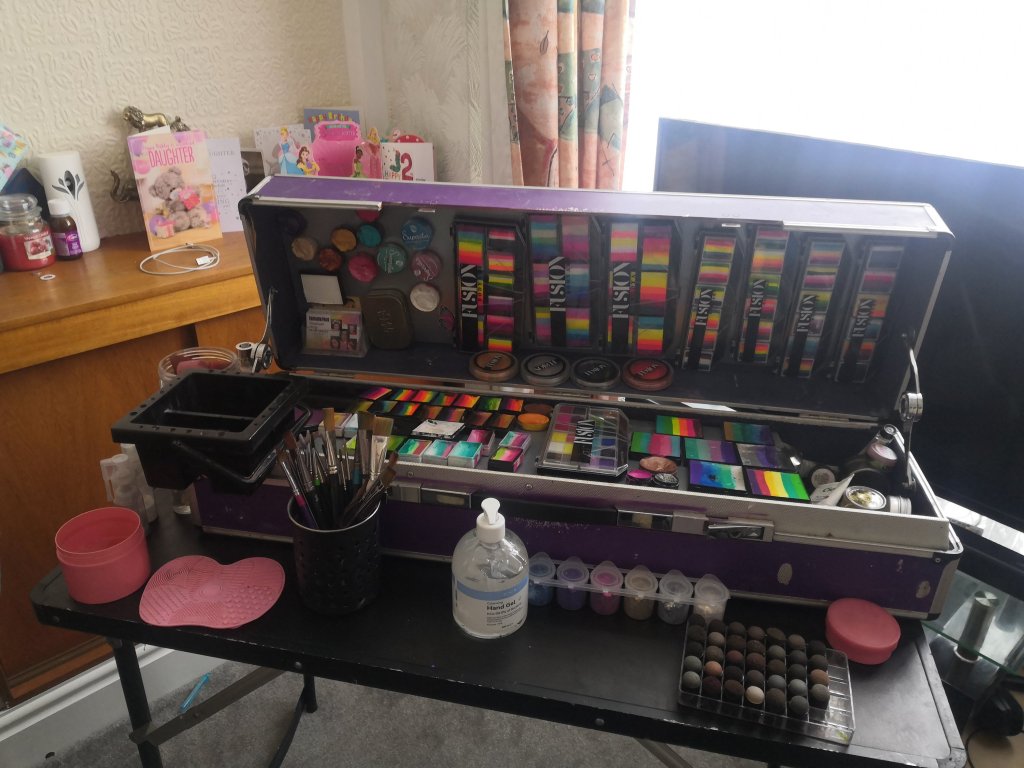
Friday- Prepping For The Weekend
As Friday rolls around the excitement builds for any facepainter or entertainer. We’ve secured our bookings, we know where we’re going tomorrow and Sunday, we just need to ensure we have everything we need!
It’s important to go through your kit, ensuring everything is clean and in good condition. Replacing stock and making sure you have everything you could possibly need.
I’ll go through my kit, making sure I’ve enough of what I need for the weekend. I’ll add what I don’t have, having ordered it Sunday Night or Monday Morning. Once I’ve opened my paint, I need to add it to my inventory list, with the date it’s opened, batch number and its use by date. That way I can keep my kit in tip top condition. If I were to use an out of date paint, and the client had a reaction to that paint my insurance would not cover me!
At this point, I like to Google the addresses of where I’m going, as I’ve no sense of direction and quite often in the past arrive flustered and apologetic as I’d driven past the venue 3 times! Learning from this, I always like to have a rough idea of where I’m going. Even if it means using street view and making the trip virtually!
Everything clean and ready, I’ll keep it at the ready for Saturday.
Saturday – Painting Time!
I always have my chair and table in the boot of my car as I have limited storage at home. So, I load up my kit into the car, with a few bottles of squash and a few snacks if I’m painting back to back.
By adding your watermark and passing your pictures to the client you can advertise even further afield!
I like to arrive 15 to 20 minutes early so I can set up without rushing. I will hand the host 20 or 30 business cards, as they contain removal advice on the back, and ask them to pop one into each party bag. This is a great way to get your number out there!
Once finished, I get home physically and mentally drained. I’ll prepare something quick for dinner and once the family is settled down, I gather my used sponges and pop them in the washing machine and wash my used brushes. If my kit needs a wipe down I will do this too, ready for Sunday.
Sunday – Rinse & Repeat
Sunday is usually just as busy as Saturday, so it is simply a game of repeat!
Remember to take pictures once you’ve painted so you have pictures for future advertising and social media platforms.
It’s important to have some on the job pictures, so potential clients have a fair expectation of you.
Again, once home, a quick meal with the family and its time to clean those brushes and sponges! At this point, I’ll take stock of my kit, making a note of any paints, glitters or bling I may need to order or make. If I need to, I’ll place the order before bed.
Ongoing Work
I conduct much of my business online, so I’ve always got my phone close by. Everyday I’m posting to social media, adding pictures or blogs. I advertise at different times, finding the optimum times for each post. Each day I learn something new. Each day I’m hustling to keep my business in the forefront of people’s minds. I respond to enquiries daily, using my phone and often find it difficult balancing a family and business. But seeing those faces at the weekend, as you reveal that spiderman or butterfly…….. There isn’t a feeling like it.
Our jobs are crazy busy but one of the most fulfilling ones we could have.
I began Facepainting over 15 years ago, stuck firmly as a hobby painter until 2016. Now I’m a professional facepainter, with an income from doing something I love!
So, you’ve discovered the joy of facepainting and mow you’re wondering if can truly make a business from such a “fun hobby”. The answer is Yes you can! It takes alot of hardwork and you will make mistakes along the way, hopefully if you take the advice from this blog you will become a “professional” in no time!
Insurance
If you are going to paint a member of the public you must have Public Liability Insurance. This isn’t just to protect your customer, but you too! You could quite easily find yourself putting your house in jeopardy due to a lawsuit.
It’s not just incase a disgruntled customer wishes to sue you, it’ll protect you from basic accidents, such as dropping red facepaint on the client’s snow white rug or even poking a wriggly child in the face. By setting up PLI you are instantly telling any potential clients that you are serious about what you do.
It’s important you use the correct products. You’ll find it alot easier to paint using these products and the finished result will be of a much higher quality.
Using The Correct Products
Using the correct products is an absolute Must. Once you’re carrying PLI all products must be cosmetic grade and used as instructed. Unfortunately our industry is flooded with unscrupulous vendors who will sell craft items as cosmetic grade paints/glitters. You must be vigilant and buy from trusted vendors who will be more than happy to supply MSDS sheets and even help you select the correct products for you!
When I first began many many years ago, I unwittingly used craft glitter on children’s faces. I had absolutely no idea that cosmetic grade glitter even existed let alone that I should be using it! I was extremely lucky. Craft glitter contains metal pieces, which have incredibly sharp edges. If that had gotten into a child’s eye it could well have blinded them.
Reach out to local Facepainting Groups and other professionals, it was the best thing I ever did for my business. I learnt more in 3 years than I did in 10!
Reach Out To Other Professionals
This is actually not as scary as it sounds. Our industry is one of the most welcoming I’ve ever come across.
Begin by joining local Facebook groups, such as “Newbie Facepainters Help Group”. These groups contain a wealth of knowledge which you can tap into to help improve your skill. Don’t be scared to ask questions! We were all newbies once. I remember wondering what OTJ meant, but was too scared to ask. Luckily another lady had the courage to ask, and was met with so much love and compassion I was enthralled. By the way, it means On The Job 😉 Many of the artists in our community are only too happy to help new painters.
By reaching out like this you’ll gain invaluable information, from what paints are great for linework, to favourite brushes and even hygiene on the job. It took me many many years to perfect these, but I honestly can say I’ve learnt more through social media than any book or job!
I was once told it is better to offer 10 designs you can do very well than 30 might be able to get away with. It’s something I’ve stood by for many years.
Practice, Practice, Practice!
Ofcourse, it’s important to practice designs and techniques. I was once told instead of trying to master 25 designs, pick 4 and master them first. By mastering them I mean you know how to paint these four without even thinking! You can paint them proficiently and quickly. Time yourself, you’re looking for around 4 minutes per design. Once you have those 4 under your belt, add another 4, and then once you’ve mastered them another and so on. It’s far better to have 12 strong designs you can paint quickly and effortlessly than struggle through a selection of 30.
My top ten designs are Tiger, Spiderman, Batman, Butterfly, Unicorn, Cat, Dog, Fortnite, Among Us and Fairy Princess. Ofcourse, these can change depending on what’s trending at the cinema, television or social media.
Don’t undervalue the service you provide! Even at a beginner level you need to keep your prices in line with other professionals in your area. If you need someone to cover a job, you’ll find it impossible if you’ve charged alot less than others.
Know Your Worth!
It’s only natural when you first begin to facepaint that you u devalue yourself, your skills and the service you provide. After all, you’re entering into a very artistic and competitive market. You’ll look at other’s work and automatically under charge as you don’t feel as “gifted” as that painter.
It’s important to not undecharge by too much. Perhaps a £10 or £15 difference in price would be a good starting block. If you do choose to charge less than other painters in your area it is important that you make it clear to your potential clients that this is an introductory offer only. Trust me, it is alot harder to increase your prices than to decrease them. You’ll also create issues if you need to outsource the job due to illness or other commitments. You may find yourself paying more for another painter to take on a gig you’ve already committed to.
Ofcourse, many new painters often stick to friends and family for their first few gigs, which is great as you get important on the job experience and a real feel for your strengths and weaknesses. If you choose this route make sure you’re compensated for your tone, materials, insurance and travel costs!
Enjoy!
You’re now set to dip your toe into the crazy, passionate, fun world of professional facepainting. Set up a Facebook business page and invite all your local friends to like and follow! The best advertisement is word of mouth, and hopefully within a year you’ll be replenishing stock and planning for the next year’s events!
I hope this has been of some help to you. Please feel free to take a look at my other blogs, such as my open letter to charities explaining why we should be paid by the hour. There are even step by step blogs for you to look at.
Don’t forget to follow me on Facebook and Instagram for more cute designs and information.
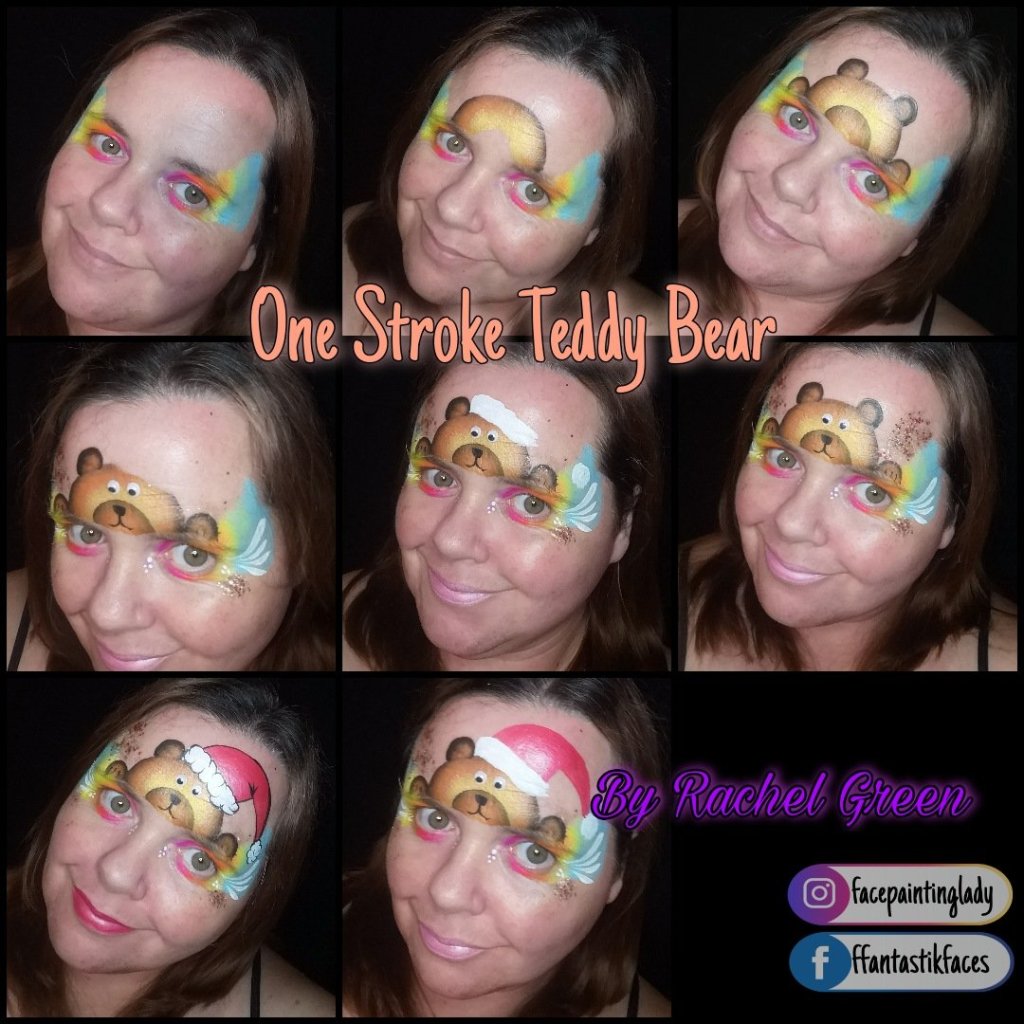
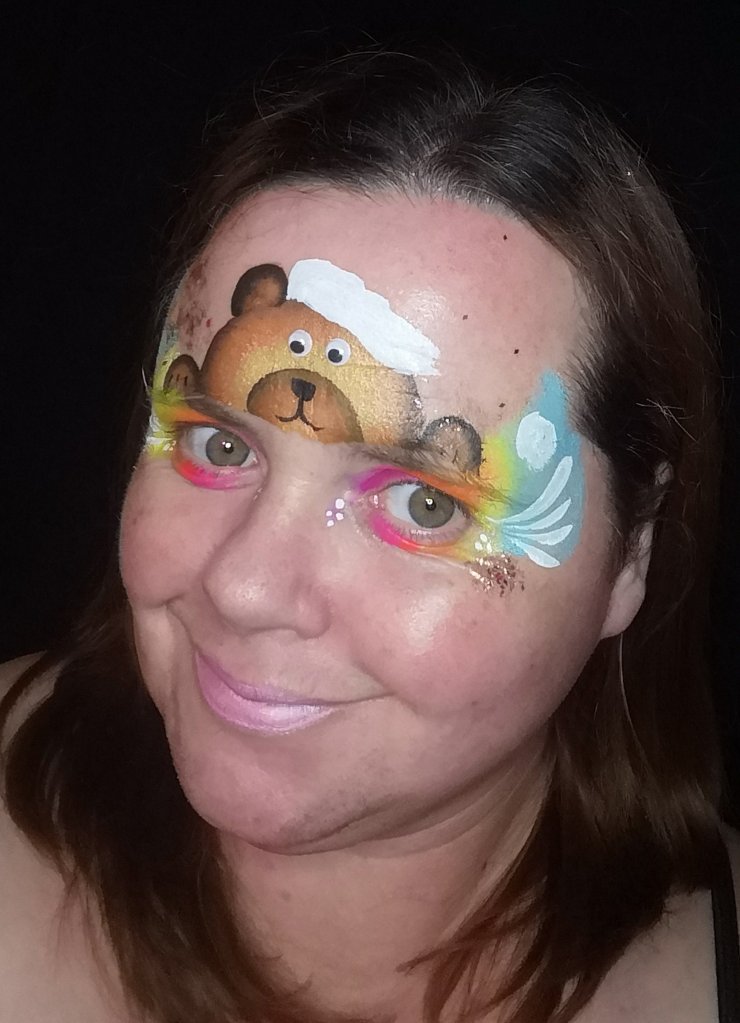
This is such a cute design and easily accomplished! You can change Ted’s hat for an Irish hat during St. Patrick’s or any other holiday!
Step One; Base
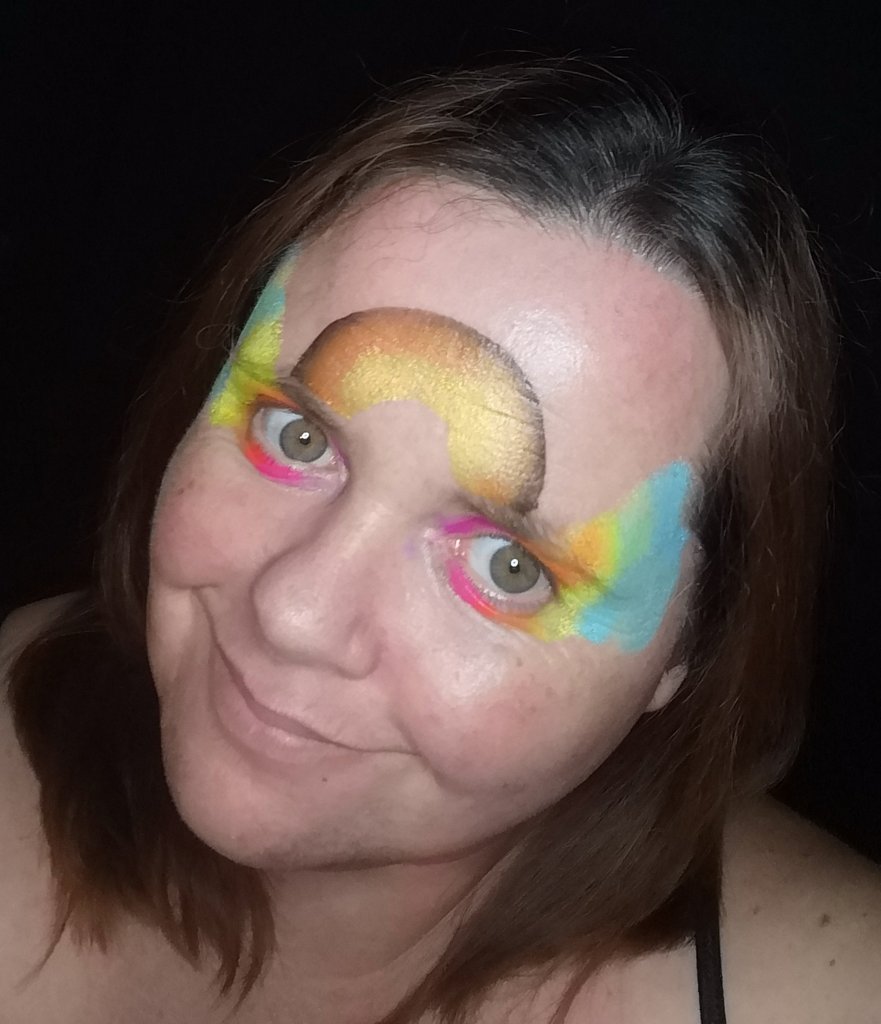
A Bright Split cake is a great way to start this design, or you can even use the Superstar paints I recommended earlier for a more subtle look.
Using one of the split cakes I recommended previously, you can lay down a quick base over the eyes and bridge of the nose. If you wanted to be more suitble you could use one of the Superstar colours, which are perfect for bases! A quick poof of iridescent glitter will add the sparkle you need.
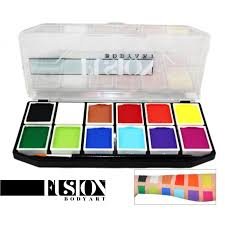
Using Fusion’s Rainbow Explosion Pallette, you can easily recreate this design. Using the brown onestroke in this set, you need to paint Mr Ted’s head. Load the 3/4″ long bristle angled brush you need to paint half a circle. Begin at the inside of one eyebrow, finishing at the other. Using the eyebrows, you’ll ensure the design is centred and balanced.
Step Three Ted’s Muzzle, Ears & Paws
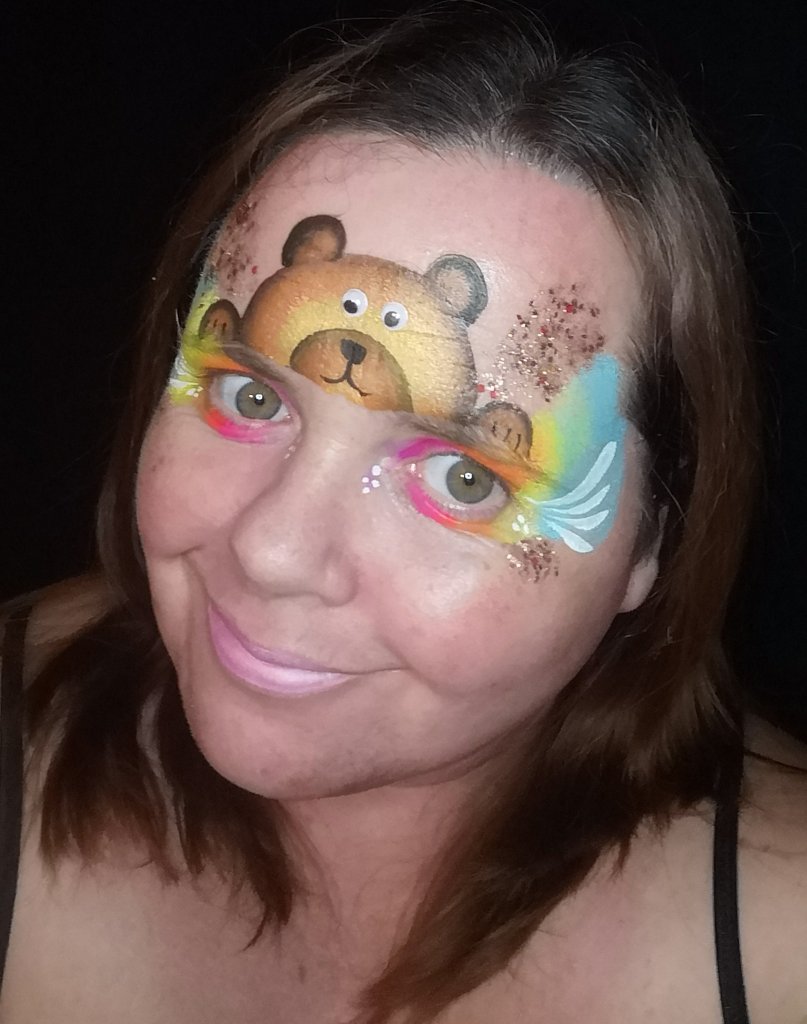
We can clearly see Mr Ted taking shape.
Now, using the large angled brush, (which is slightly smaller than the 3/4″), load again, using the brown onestroke from Fusion’s “Rainbow Explosion Pallette”. Paint another half circle in line with the first to create Mr Ted’s muzzle. We can then add Mr a Ted’s ears and paws. We do this by keeping out half circles very tight. We keep the heel of the brush centred and pivot the brush, letting the longer bristles on the outer edges of the brush do the work.
Step Four; Finishing Touches
I absolutely HATE painting eyes! Wherever possible I love to use googly eyes, simply fixed to the design with a cosmetic glue.
As I stated, I hate painting eyes. Every single time I try I’m left feeling really deflated and annoyed at myself. So now, I cheat! I love using googly eyes. The kids live the googly eyes. I buy them from any craft store, and I fix them to my design using any cosmetic grade glue. Please remember they pose a choking hazard to any child under 3 years!
Using Fusion Black and a Number 3 Round Brush, I will add a muzzle and nose to Mr Ted, oh! and a few claws to each paw. (simply 3 lines!) A few tear drops at the corner of each eye just add to the balance of the design. The tear drops are created with Fusion white paint and a number 4 round brush. A smudge of chunky glitter and your design is complete!
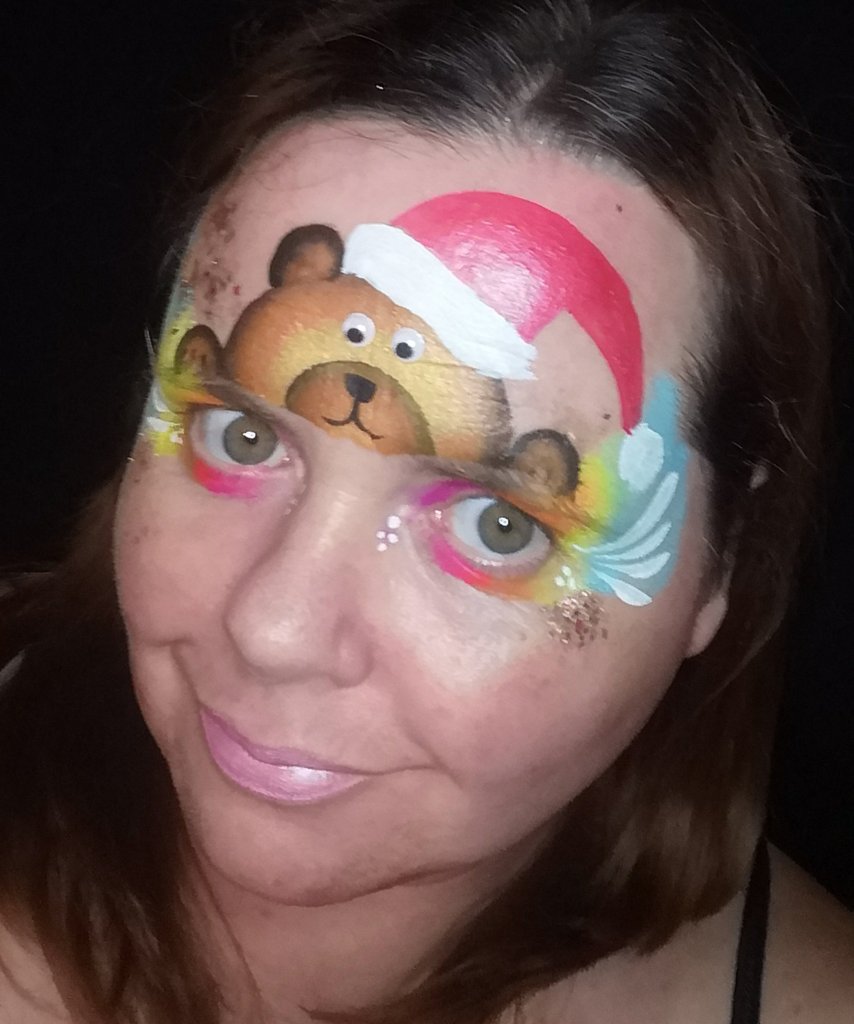
Bonus Steps-Let’s Make Mr Ted Festive!
Is design is great for any holiday! You can add a Santa’s hat for Christmas or even a pilgrim’s hat for Thanksgiving!
Shhh…. We won’t tell…..
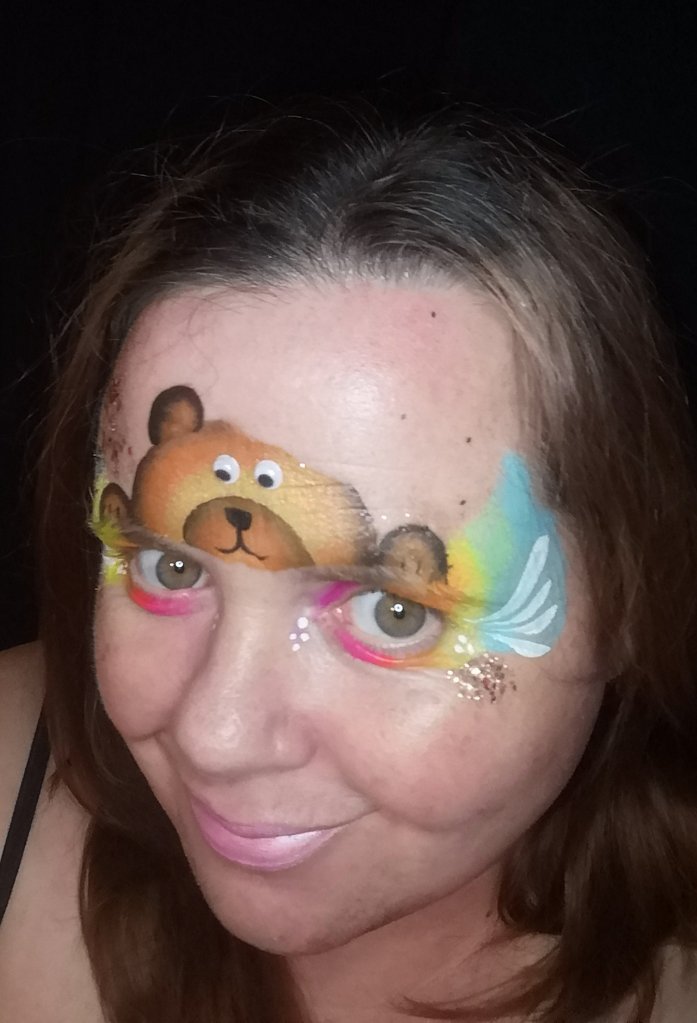
You can really have fun with this design and make Mr Ted a bear fit for any occasion! He looks great with a Santa’s hat for your Christmas Board, but can easily replace that with a green hat for St Patrick’s Day! A black hat with a gold buckle will make him a Thanksgiving Bear or even adding a few hearts around him will make sure he’s on your valentine’s board! One design, but alittle wipe with a damp sponge on one ear will make this bear one to stay on your board!!!
Simply taking a wipe or damp sponge and wiping that right ear away enables you to add a fun festive hat to a simple design!
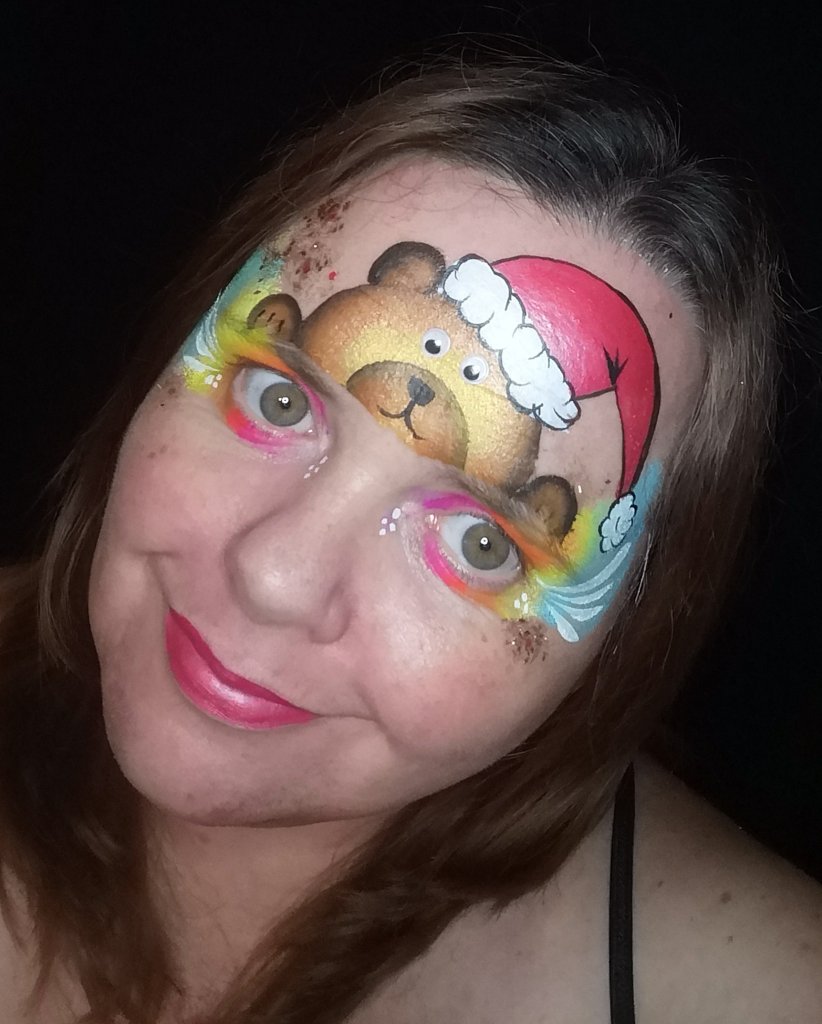
Adding A Santa’s Hat
Add the fluffy white trim and ball to your Santa’s Hat
You could use a small finger dauber dipped into some fusion white to create the Santa’s trim and ball. Or, using a number four round brush you can quickly paint them in.
Using Superstar Red add the Santa’s Hat. A number 4 round brush is fine for this.A quick outline adds depth and detail.
Using the Fusion Black with a number 3 round brush, quickly outline your hat, trim and ball. Remember to always begin on the tip of your brush, slowly adding pressure as you paint your curves, bearing completion of the curve, alleviate the pressure of your brush, finishing once more on the tip. By doing this you’ll create perfect linework, with thin to thick to thin lines that lift your work to a much higher standard. It’s important when outlining, especially with a darker colour, to ensure your paint consistency is correct. I like to work with an inky consistency, this will ensure I’m not loading my brush constantly, which allows me to paint consistently creating a magnificent flow.
This is such a simple, yet cute design which is constantly on my board. It’s one I can change up whenever I feel I’m able. I can add extras to it such as hats and other additions, such as bows. I can change the colour of the bear if I wish, going from pink, blue, purple even green! The sky truly is the limit! This design really has no constraints, and will be on my board for many years to come!!!
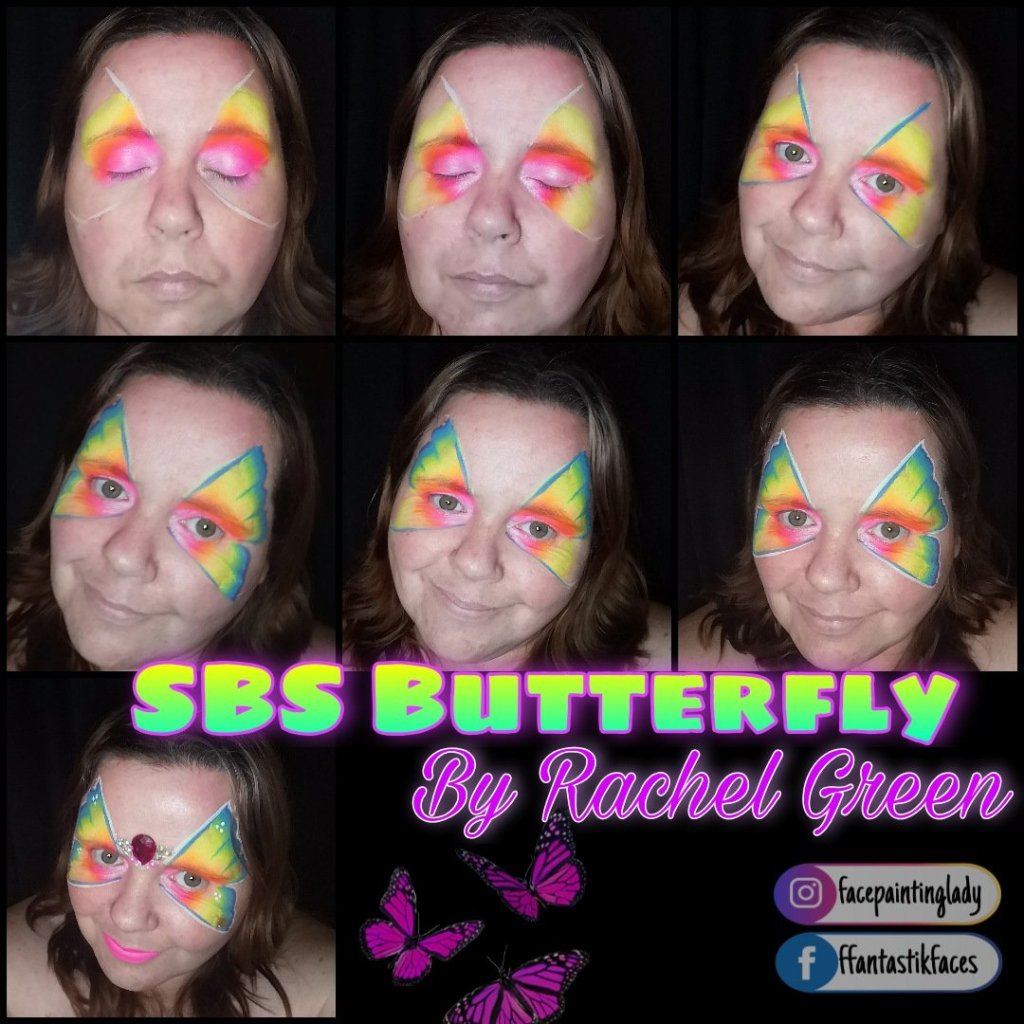
All of the items I use to create this butterfly are available from The Facepainting Shop online shop or app.
A Step By Step Guide.
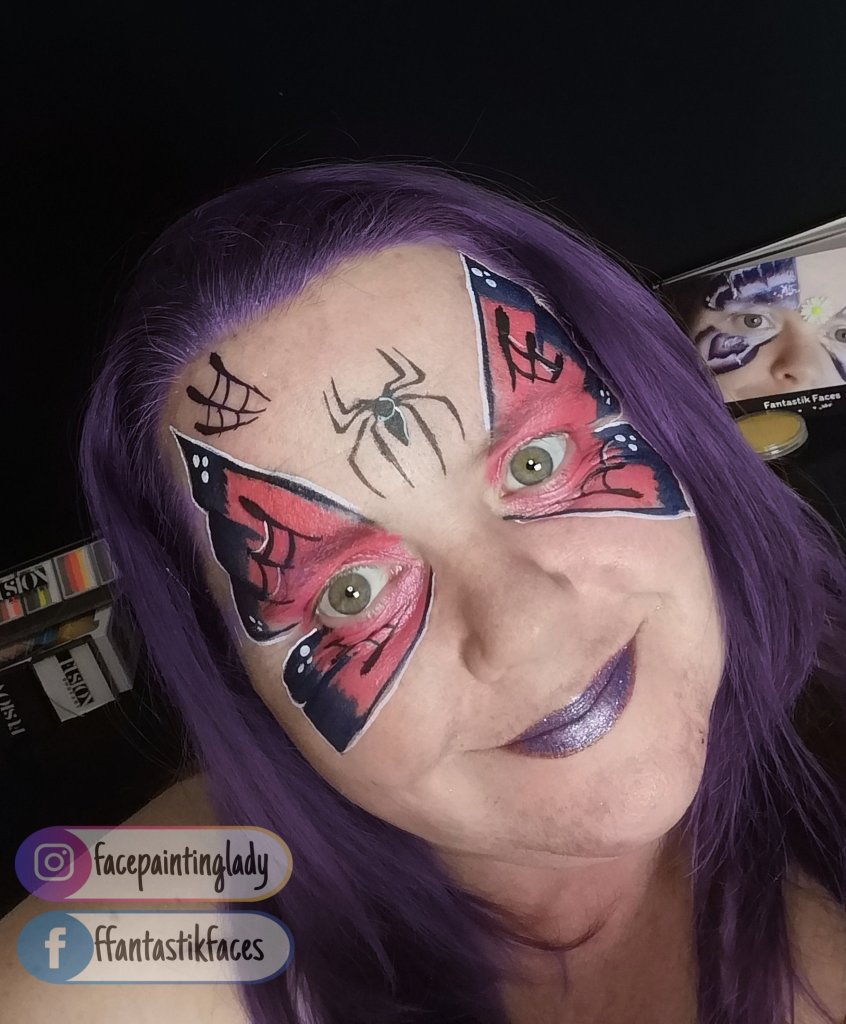
The Butterfly is one of the most requested designs you’ll ever paint. To be able to paint it quickly and effeciently is crucial.
The Butterfly is by far, the most requested design you’ll ever paint, so getting it right is important. Being able to paint it quickly and effeciently is crucial if you wish to grow your business.
Placement is Key
What ever butterfly you decide to paint, placement is crucial. Alot of painters often struggle with symmetry and getting the wings balanced. I’ve a few tips to help you overcome these issues. I was told many years ago that if I found it difficult to get my butterflies balanced, I should paint my weaker side first. That way I’d be able to replicate that without any issues! So, if I was right handed, I painted the left side first, that way I could replicate that side with minimal issues. I followed this for many years, and found it a huge help.
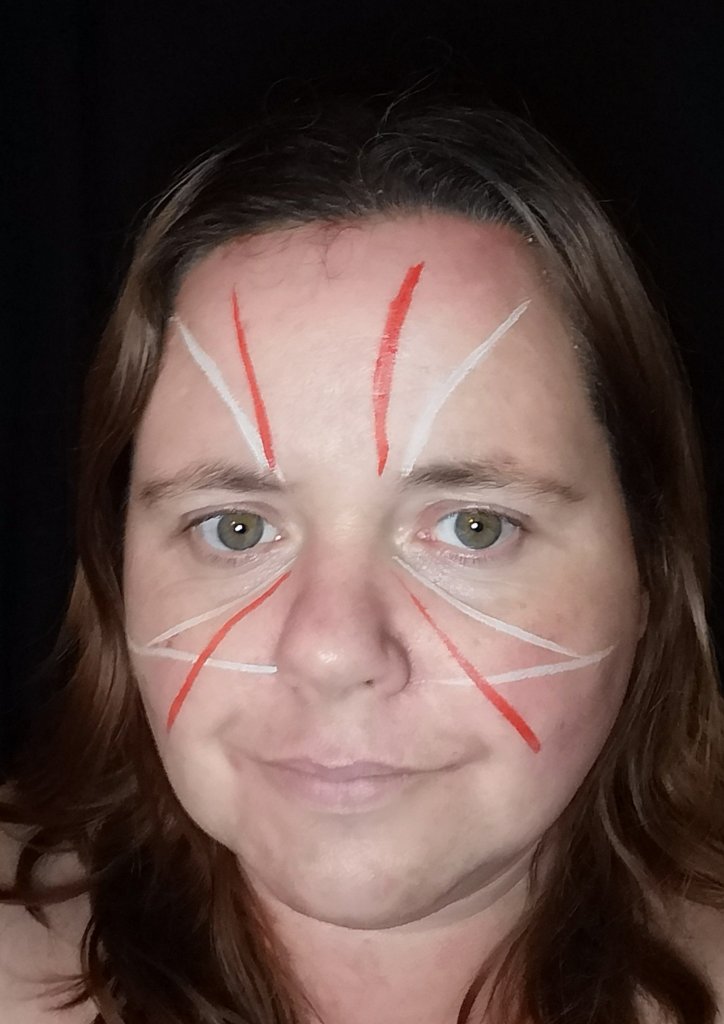
There are key areas to concentrate on when creating a butterfly. I find it easier to quickly sketch my lines out, even on the job, parents never notice!
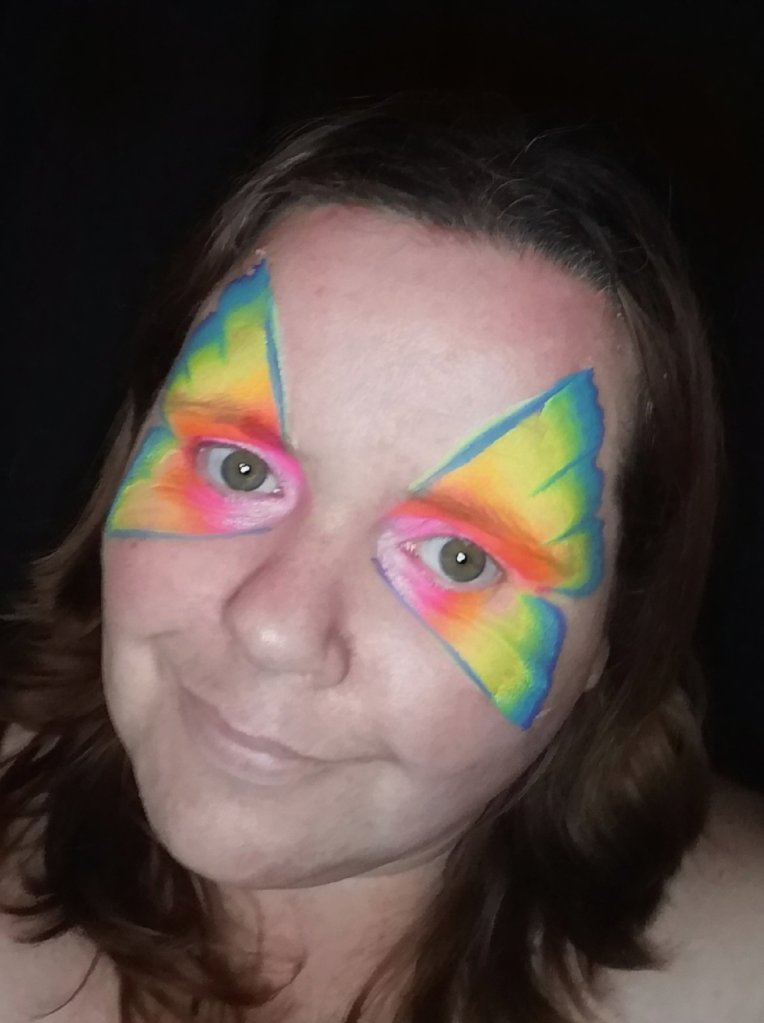
Errors We ALL Made!
If you look closely at the picture above, you can see some simple errors we’ve all made when first starting out. The red lines indicate where a beginner painter may place a butterfly. A rule of thumb with butterfly layouts, is each top wing begins from a focal point at the centre of the face, at the bridge of the nose. The wing will then go from this point at a slight angle, gently passing the edge of the eyebrow. Not, in the case of the red line, where it is a more severe line upwards, without the gentle slope.
The bottom wing, needs to be smaller and quite tight in comparison to the top. We again, start from our focal point with a gentle line, finishing on the apples of the cheek. Many make the mistake of bringing the bottom wing down more, almost in line with the lips. As you can see, from my guide lines, my bottom wing finishes almost in line with my nose. This will help you create a far more delicate butterfly that doesn’t cut the face in two.
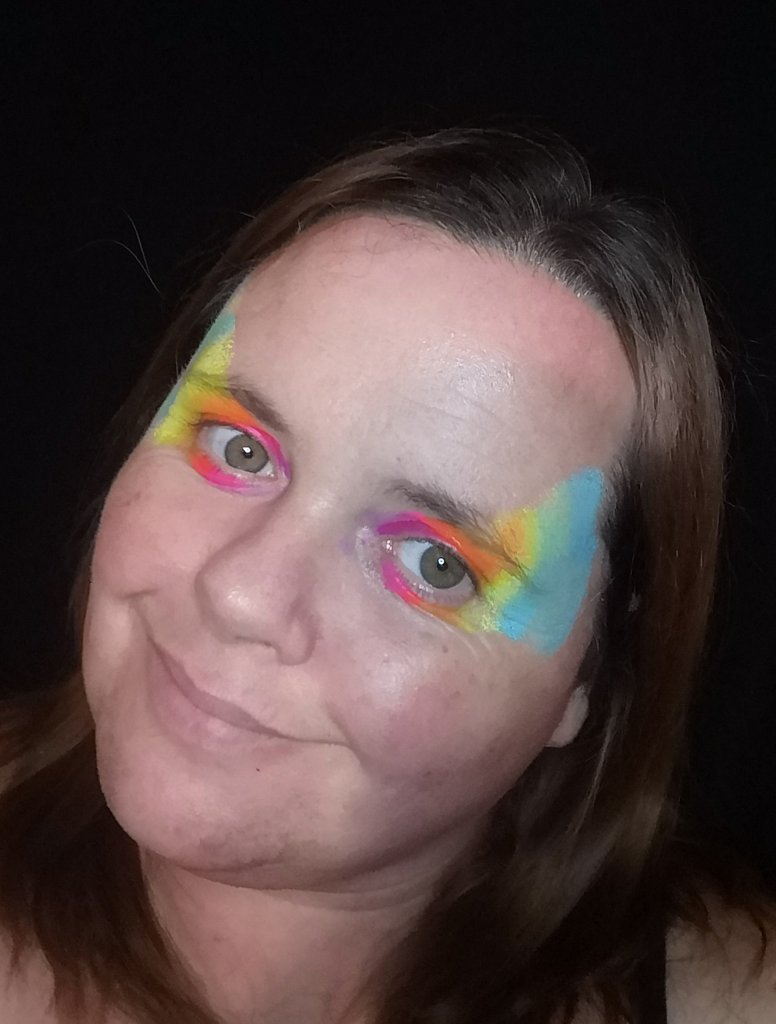
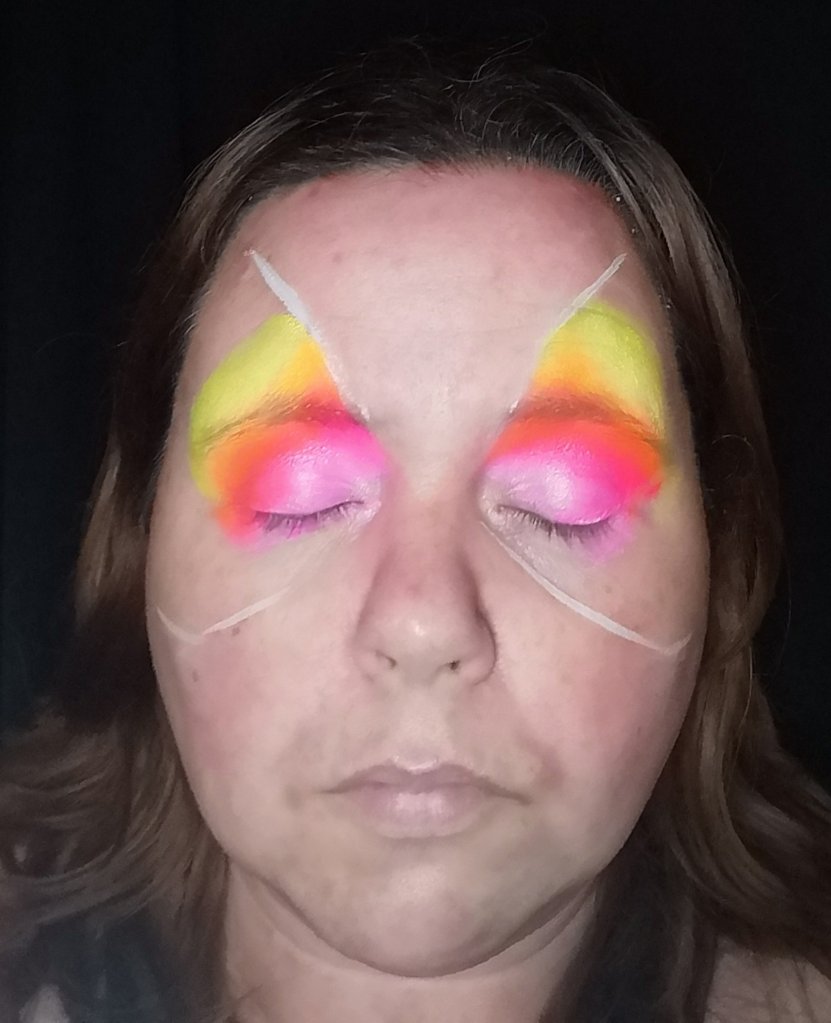
Step One; Top Wings
As I stated previously you can quickly sketch out the positioning of your wings, this helps you keep you design balanced easily. Don’t worry about what your client or on lookers think, it’s what works for you!
Using a bold split cake, you need to successfully load your sponge. You can use petal sponges if you prefer, or cut up baby sponges work well too! I spray my sponge with water, ensuring its damp, but not overly wet, I want my paint to look opaque and bold. I gently dab the sponge onto the clients face, keeping in my guide lines. I like to keep a lighter colour on the inside, with darker on the outside. But this can be flipped! One split cake can create many fab looks by simply flipping your inside colour!
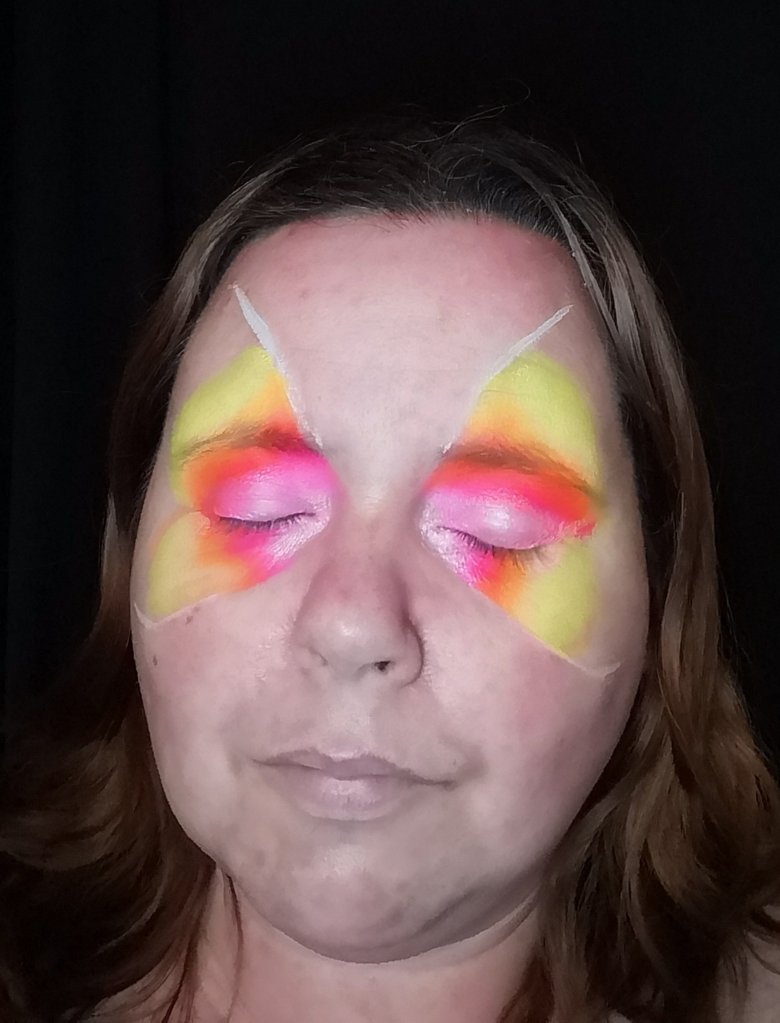
As I stated, the bottom wings are alot smaller and delicate, compared to the top wings. They begin at our focal point and end on the apples of our cheeks, almost level to the nose. This us where the petal sponge becomes invaluable. So easy to load and dab! But, if you don’t have any petal sponges available, you can load your sponge as normal, and simply pinch the corner which will be closest to the focal point. This creates a beautiful, delicate bottom wing
By pinching the end of your sponge you can create your own Petal sponge, which will make it easier to create that delicate bottom wing.
Step Three; Outlining
A quick outline using a bright onestroke will give your design added depth. I don’t worry too much about my guide lines as I’ll outline in white later.
Now the wings are complete, we can outline them with a quick onestroke or a bold colour. I prefer to use a one stroke, as I feel it can add extra depth and interest. You can use the Fusion “Rainbow Explosion Pallette” here and choose a onestroke to compliment your split cake.
Load your 3/4″ long bristle angle brush, being careful to not flood the cake. I tend to submerge my brush with water, then run the bristles on the edge of my water carrier to loose the excess water. I find it’s much easier to add a little water to my brush than to fix a flooded cake! Once my brush us loaded correctly, I will paint over my guide lines. To do this I will use the brush in a cutting motion, using the side to create that thin line. By using the brush in this way, we a minimising the amount of brushes we’re using in one design, thus keeping the design quick!
Once I created that line, I will then outline each wing, using the whole width of the brush to create a two tone outline. Always keep the darker colour on the outside as this cuts will outline our wings! The top wing, we usually seperate into 3 distinct sections. They’re usually staggered, often tightening into the corner of the eye. Different artists have different techniques of creating these 3 segments, so it’s worth studying other’s work to see what you find more pleasing.
The bottom wing is outlined in much the same fashion, except this wing usually has 2 definite sections. Again, many painters have different finishing flourishes here, some with add curls and other embellishments. Take at look at your favourite artist’s and try to work out what they’re doing to create interest and texture!
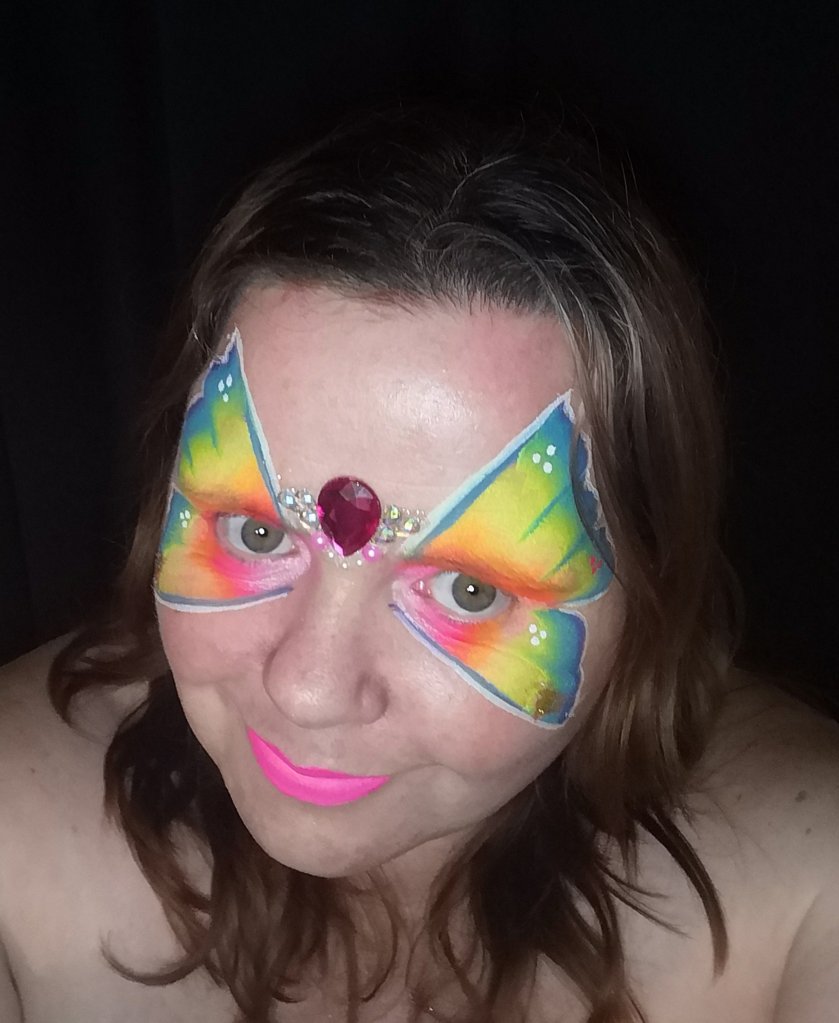
Step Four; Finishing Touches
A simple gem cluster instantly brings some glamour to your design. Adding some white dots and a white outline will really make your design pop!
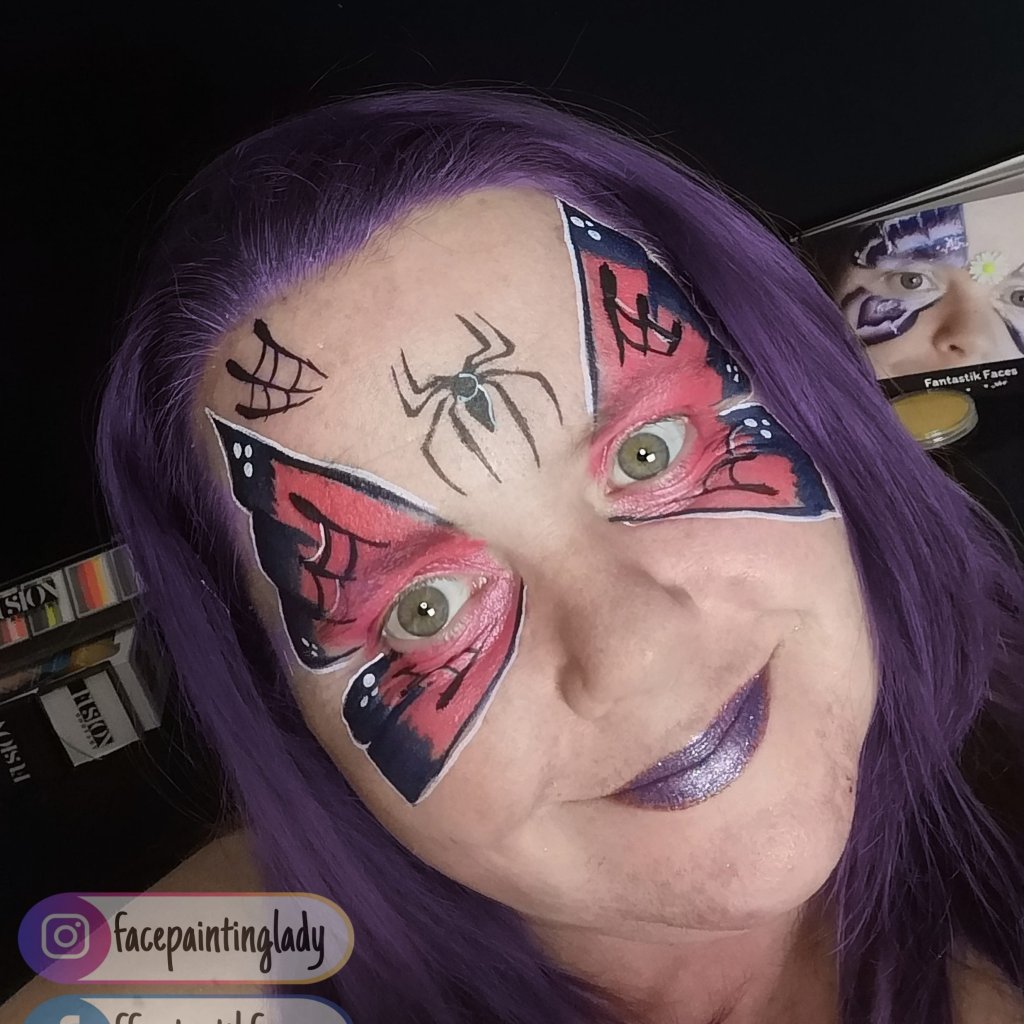
By now we can clearly see the butterfly we were hoping to achieve. If I was at a busy festival with a line 30 deep I’d be sorely tempted to add a body, antennae and a Puff of glitter! And that would BE OKAY!!! It’s important to know we can do this when we need to. But, if I was at a private birthday party, and this was the birthday girl I’d be wanting to add some embellishments and finishing touches.
A quick outline with fusion paraffin white can really make your design pop and stand out. This process is alot easier to do than it sounds. The key is using the correct brush and having the paint and the right consistency. Using a liner brush with an inky consistency means you can outline quickly and effortlessly. A few white dots on the outer edges of the wings also helps break up the design, really lifting the already bright colours.
A little glitter and a gem centre piece will lift your design to another level. I often tell the little one that the gem piece is reusable and they could use it on their dolls (if they’re small) or the older children I suggest they pop it on a photo frame. This then ensures my gem clusters are reused!!
On the job, I try to not paint lips. This is mainly due to hygiene reasons. Although 9/10 little ones are eating and drinking too, so it will be smudged on minutes! Even so, I guarantee you little girls want lipstick! To be hygienic, you’d need to use a disposable brushes. I always carry some cotton buds, then I can just dab these on the children’s lips instead and simply dispose after. On a side note, I also carry kirby grips. (100 for £1) as its sods law that the girl with biggest fringe wants to be a princess!!! I went through so many headbands (I always forgot to grab them back 😂) before I realised kirby grips are cheap and easy to use. The parents are always so thankful too that you can provide a grip to keep little missy’s hair away from her facepaint.
I hope you’ve found this blog useful, please feel free to subscribe to my Instagram page (www.instagram.com/facepaintinglady) to see more designs, tips and tricks to help you become a faster and more proficient facepainter!
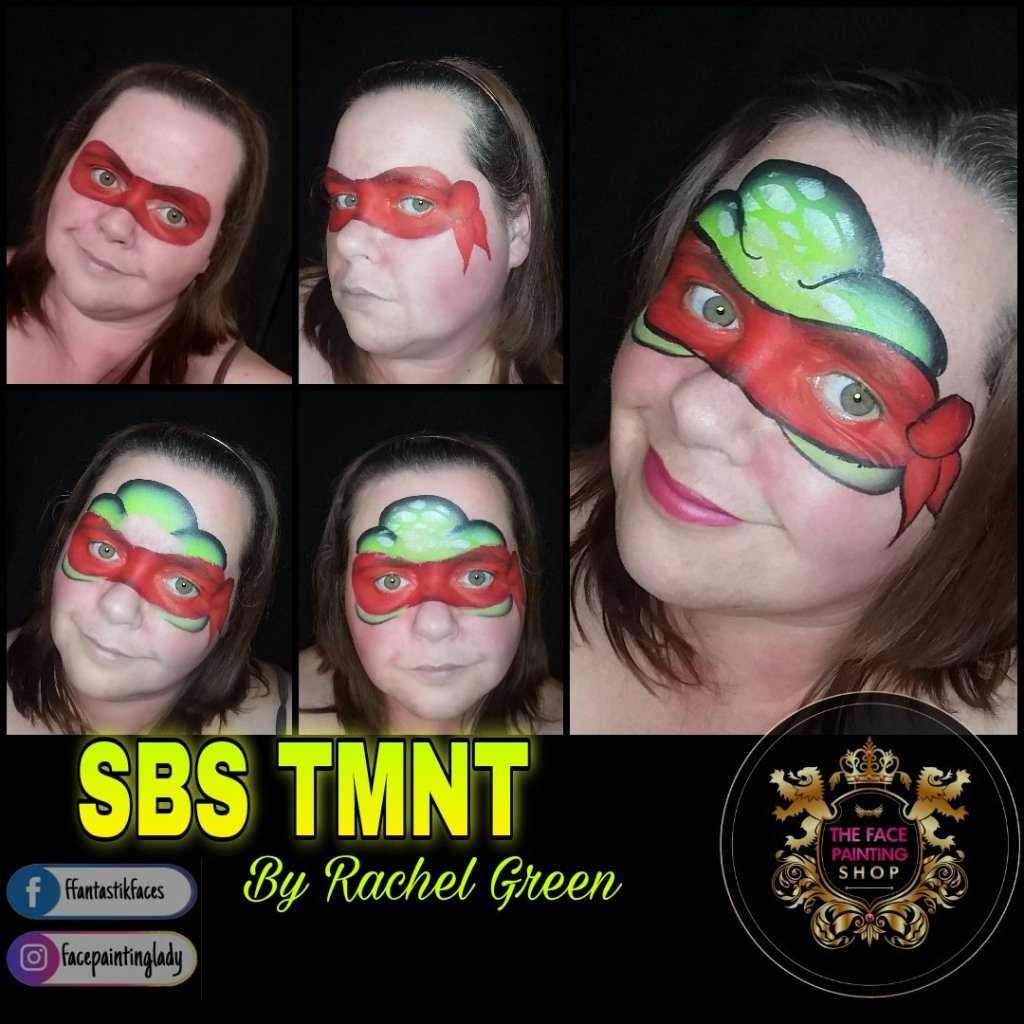
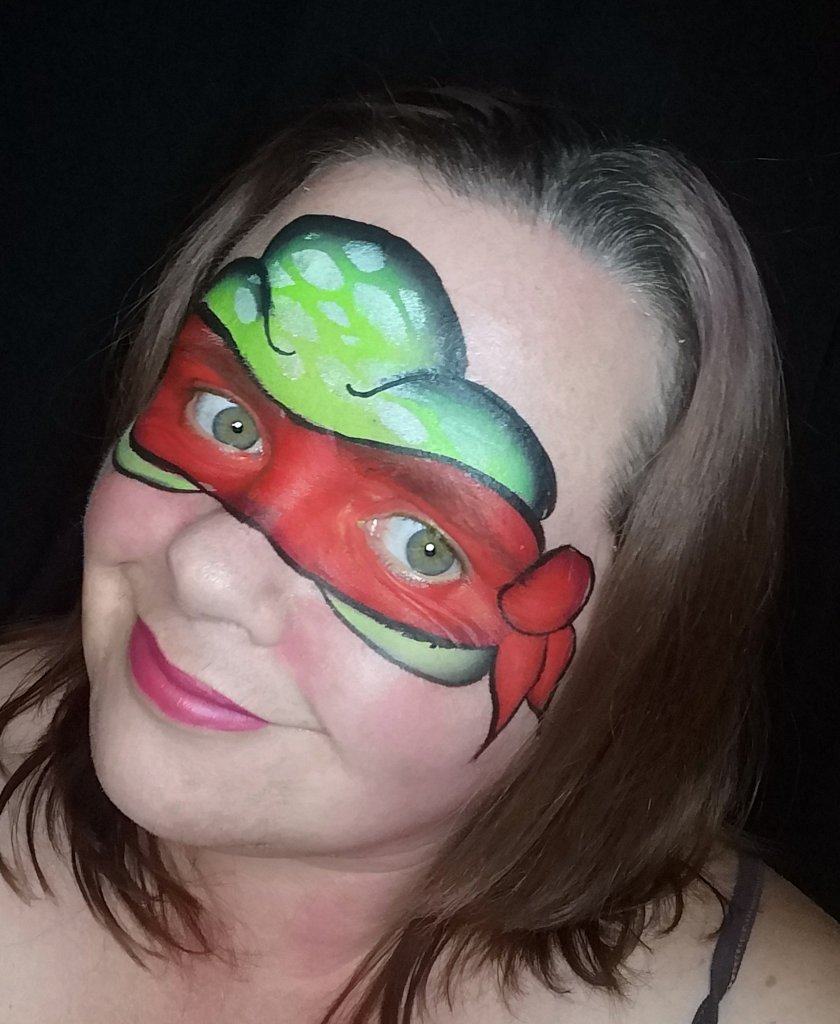
This step by step will be showing you how to recreate the ever popular Teenage Mutant Ninja Turtles design. For those of you who don’t remember them or unfamiliar with them, they’re are simply 4 Turtles who having mutated now have Ninja skills. They are Four characters. Leonardo, Donatello, Michaelangelo and Raphael. Each have their own eye covering, Blue, Purple, Orange or Red respectively. So, now you know who they are, let’s paint them! 😂
They’re are 4 different colours of eye mask so learn your colours! I usually joke and ask if that’s the pink one, great way to pretend you’re on trend!!
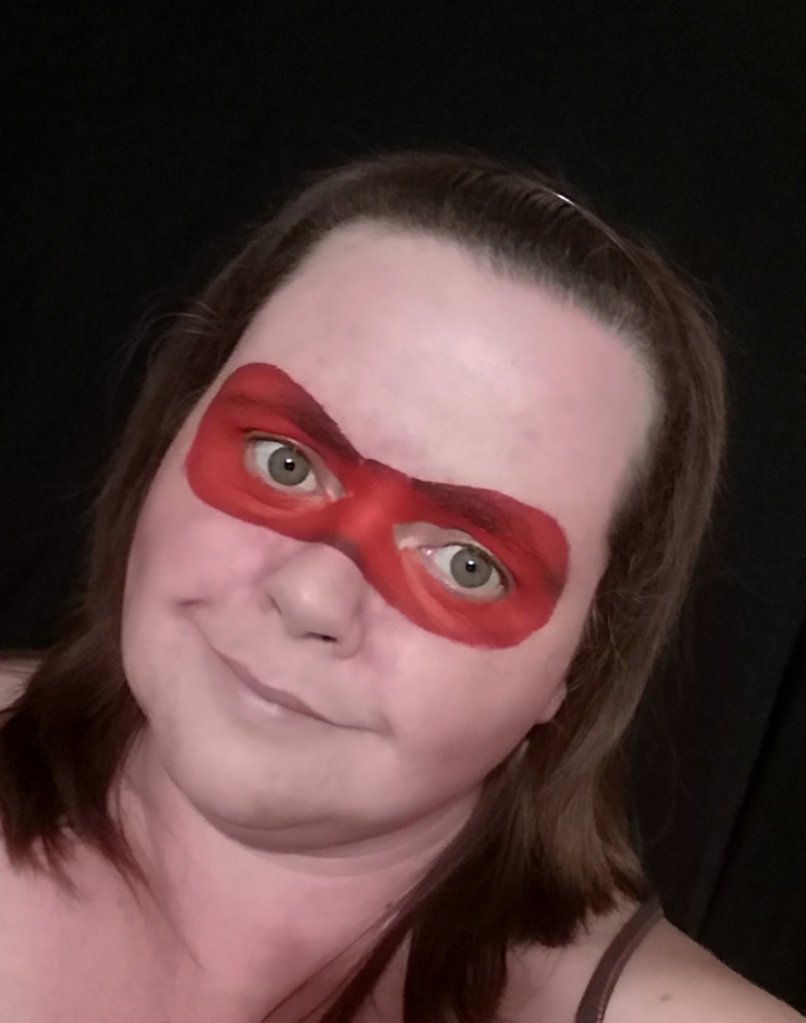
Step One Eye Mask
Make sure to check which colour the little one want to be!! Raphael and Michaelangelo are usually the top choices!
I begin by loading up my 3/4″ #pinktips angle brush with red. You can use a onestroke from the rainbow pallette. Starting in the centre, I take my brush around the eyes, using the eyebrows as my guide, this way my design will look balanced. I often use the face’s features to help plot my design. Boy’s in particular, usually aren’t keen on any brushes near their eyes. They’ll often squeeze their eyes tightly shut or will move away. I will pause when this happens and show them what they’re doing. I’ll srew my eyes tightly shut, which will make them laugh and often relax them. I ask them to gently close their eyes, like they’re pretending to sleep. This usually allows me to be able to paint this area alot more easily. 0
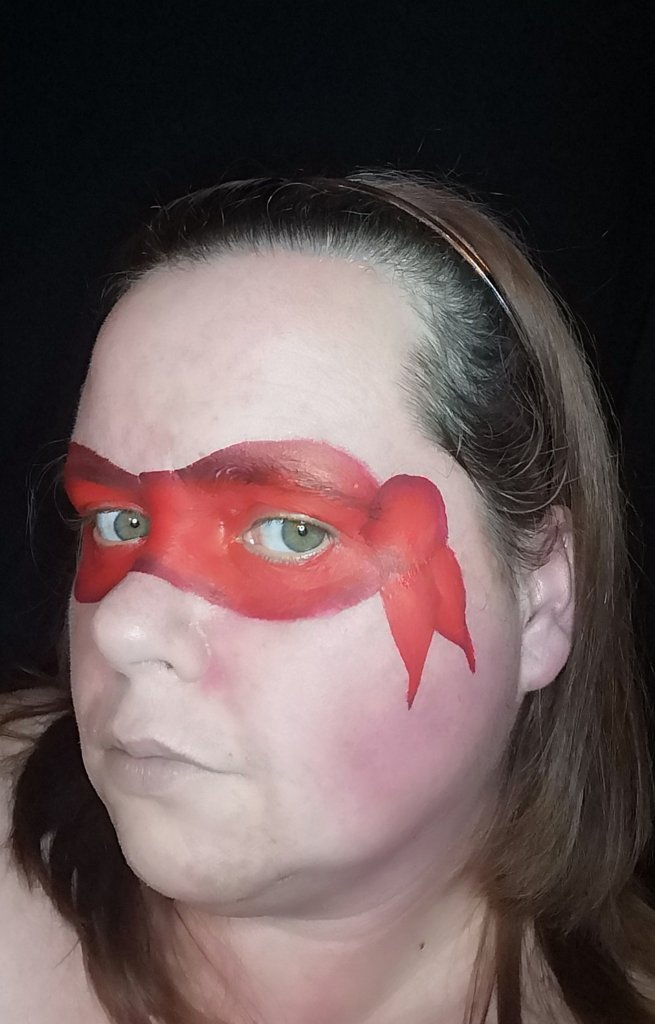
Step Two; Side Knot
The great thing with using the onestroke is that it will create a 3D feeling, especially to the knot.
Using the 3/4″ #pinktip angle brush, I quickly paint a circle. I’ll load my brush, keeping the darker colours towards the longer bristles, this will create our darker edging. Then I’m ready to create the circle, I do this by pivoting my brush, so keeping the short side of the bristles at the centre, I twist and move the longer bristle side to create the circle. By ensuring the bristles stay in situ in the centre you’ll create a perfect circle. Once the circle is painted, two upside down petals will act as the ties. Please don’t panic if you feel at this point your colours aren’t popping or you can’t tell what is what, once we outline in black you’ll see the detailing!
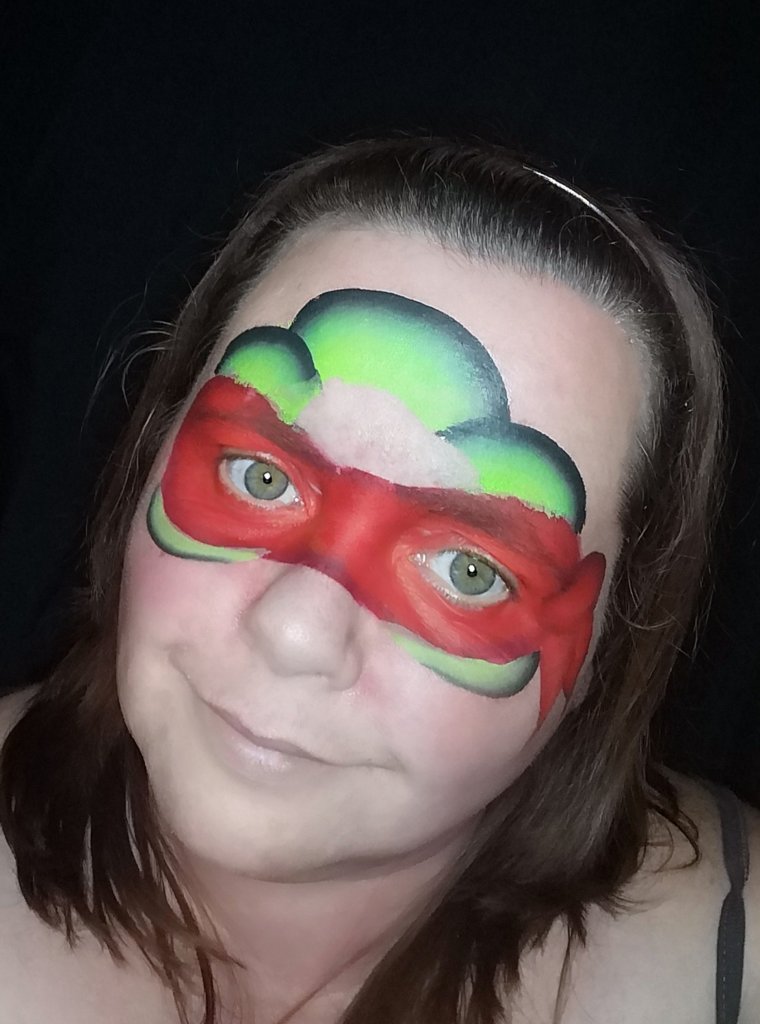
Step Three; Turtle Forehead
Using the onestroke green in the Rainbow Pallette we can create the Turtles head. Remember when loading the 3/4″ angle #pinktip brush to keep the darker greens on the outside of the brush, so we have the darker edging. Firstly, paint two arches above each eyebrow, then another arch above these, centre face. Two quick sweeps under the eye mask, on the apples of the cheeks, will create the structure of our head. Using the bristles with the lightest green on them, fill the bareskin left green.
By using a one stroke with such a dark colour, it means less outlining in black later!
Step Four; Forehead Texture
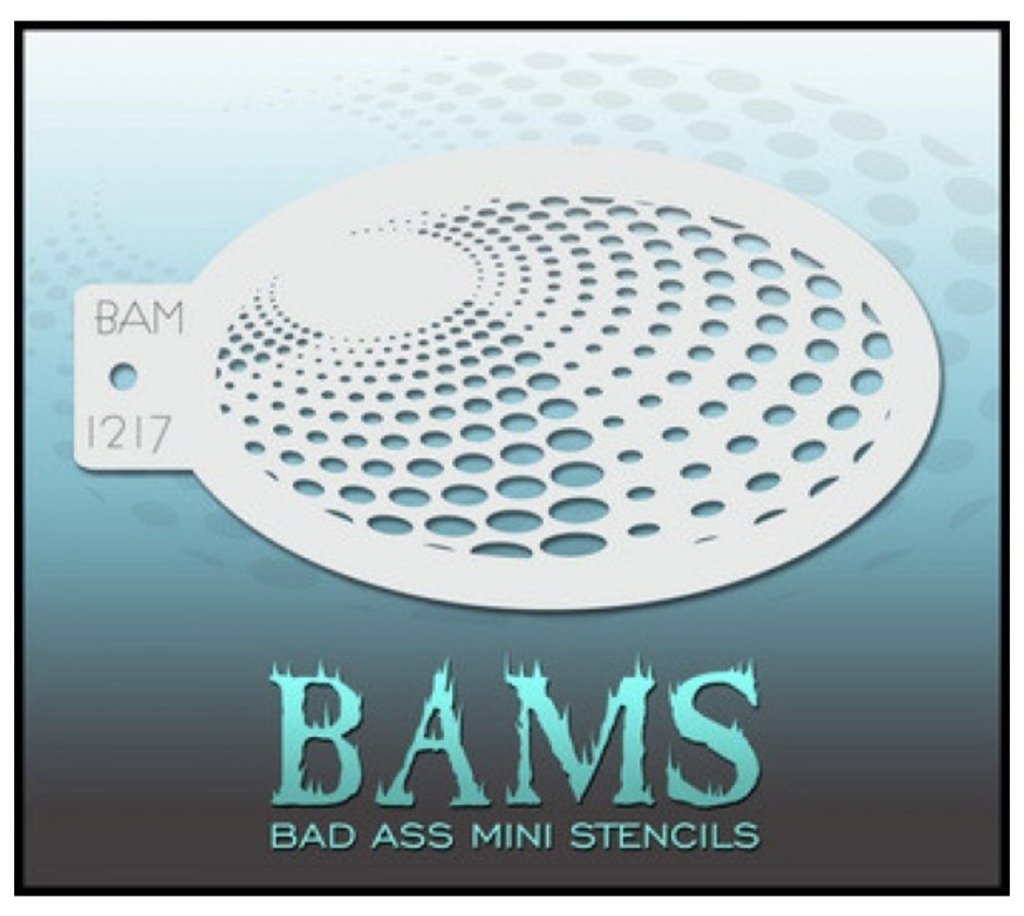
Once you have filled in the head, you can add texture using stencils. I quite like Stencil 1005 from The “BAMS” range. This is a completely optional step. If you’re pushed on time, you can skip it and I promise you, the little one you’re painting will still be thrilled!
Stencils are a great way to add texture, here you could use a darker green or even a lighter green to add some interest and depth.
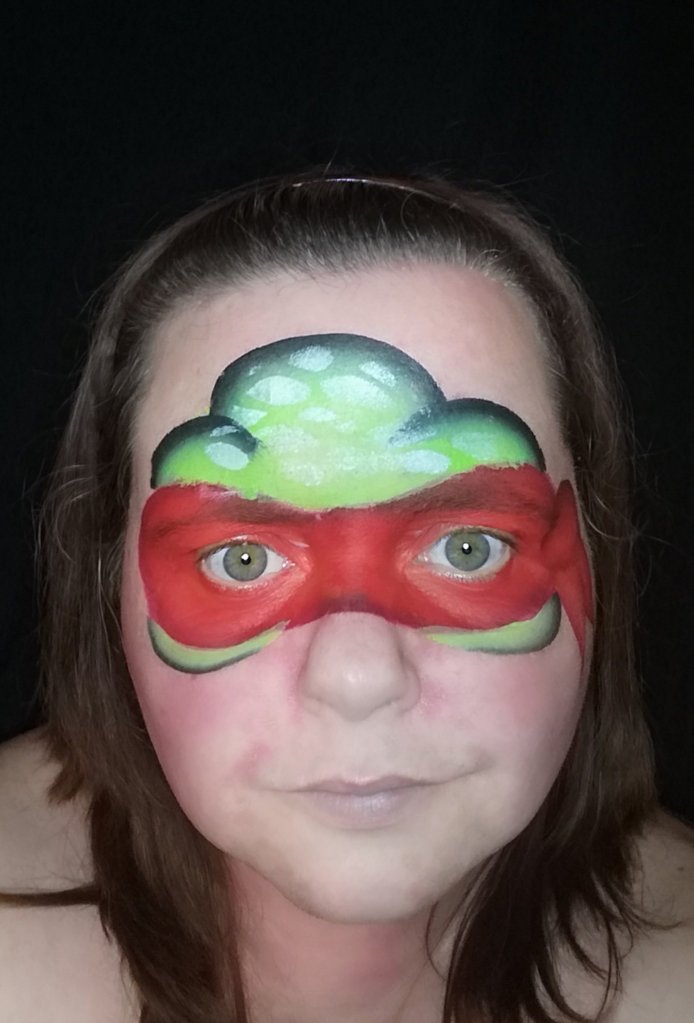
Step Five; Outlining & Finishing Touches
A quick outline of the mask and ribbon with Fusion Black, using #3 round brush really helps make the mask pop. The outter part of the design doesn’t require any outline details, as the darker edge of the green gives a great finish! The most I do, is add a downward curve above both eyes, to give the illusion of furrowed eyes. With this design I really do believe less is more, and with minimum brushstrokes, we have a great design which has such depth and brightness that it remains popular with the client.
Adding the black outline to the inner mask helps it pop, bringing the eyebrows down further also helps to bring the design together.
In my previous blog, I walked people through a selection of products from The Facepainting Shop. These products will allow you to produce top quality designs, without spending thousands on your initial set up or reset up in some of our cases!
I’ve concentrated on the Rainbow Pallette by Fusion today, in particular the green one stroke. This will be one of the most well used cakes in your kit.
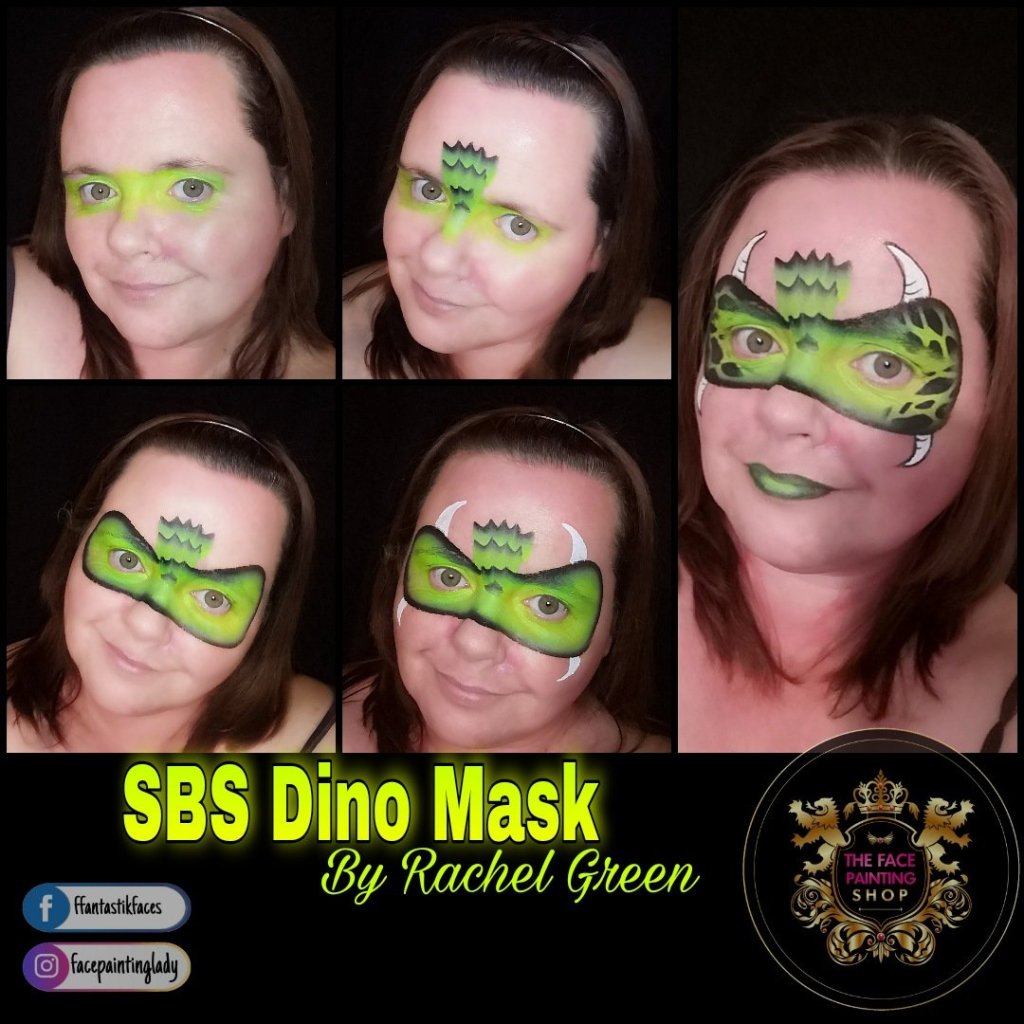
I’ve recreated a Dinosaur Mask. This is a great one for the boys, especially younger boys too, as it’s quick and easy. It’s versitile too, many times this has covered dinosaur, dragon and monster! It’s all about confidence and letting the little one and their parents know you gave just the design!
This is so versitile and Easily accomplished on the job. This is my go to Dinosaur, Dragon or Monster Mask!
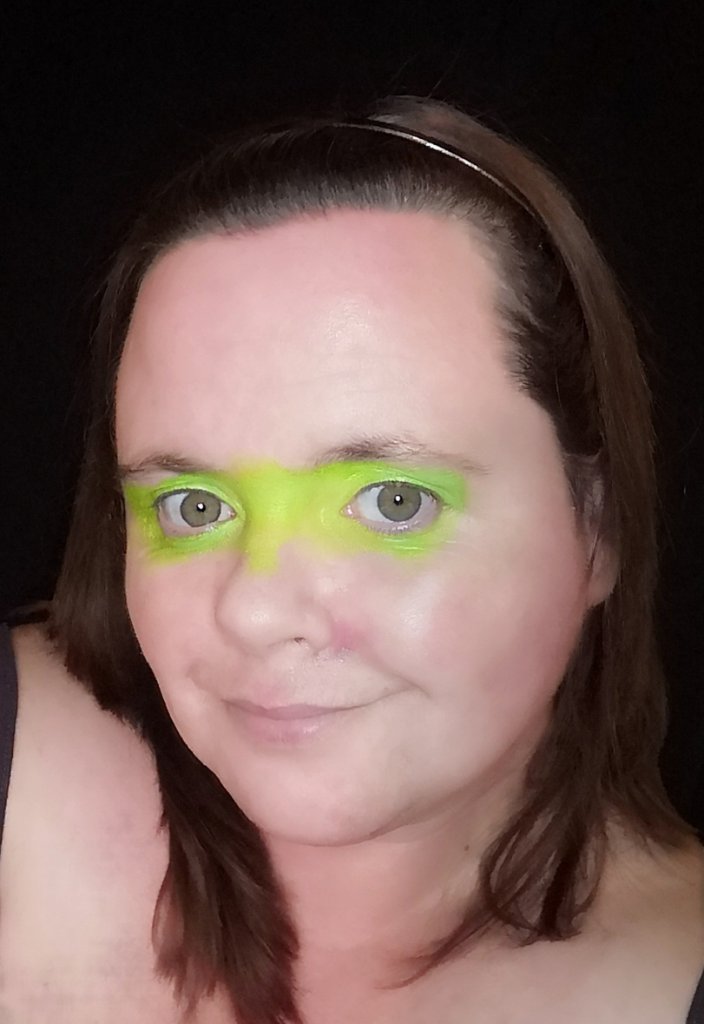
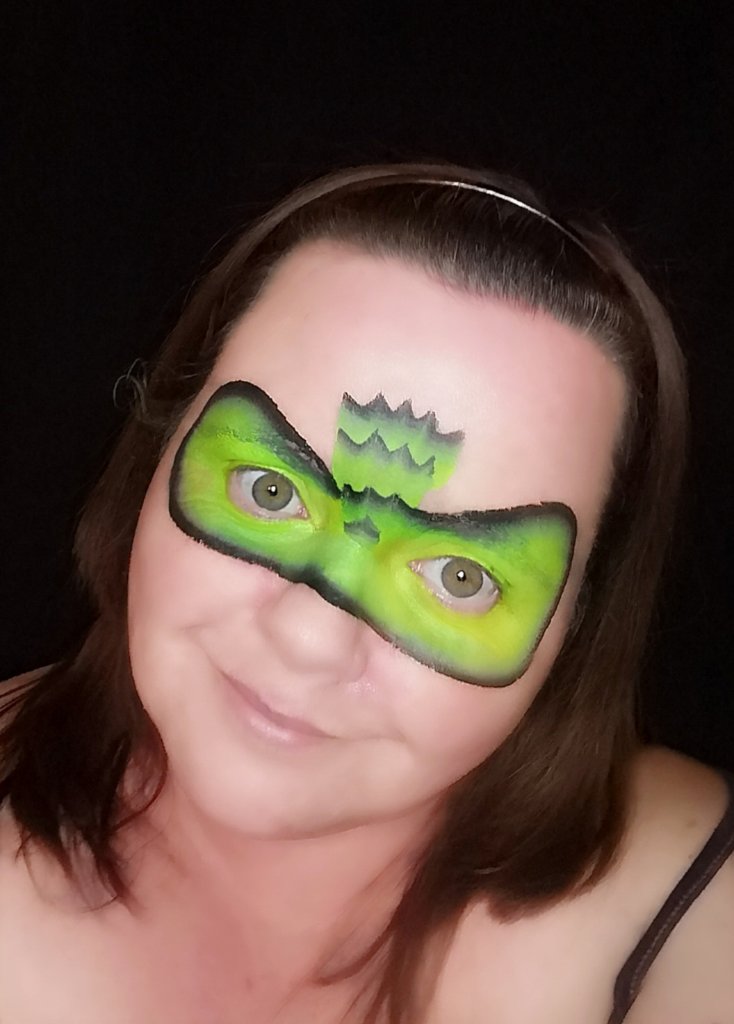
Step One; The Eyes
I usually quickly sponge the eyes, an old habit of mine, which will probably serve me well in the “New World Order”.
I’ve always began this design with a quick application of green to the eyes. I do this for many reasons; speed, hygiene and comfort.
Many of the little ones who select this design are usually between 3 and 6. In my experience young boys hate anything near their eyes. Especially brushes and other objects. A quick dab with a sponge loaded with a base colour just relaxes them quickly and they begin to enjoy the experience! Ofcourse, post COVID-19, many of us will be looking at limiting the amount of brush work around the eyes and nose area. I carry hundreds of sponges in my kit, as its important to only ever use your sponge once on the face, never re-dipping into the paint. Once you’ve mastered loading a sponge correctly it is possible to cover a whole child’s face like this.
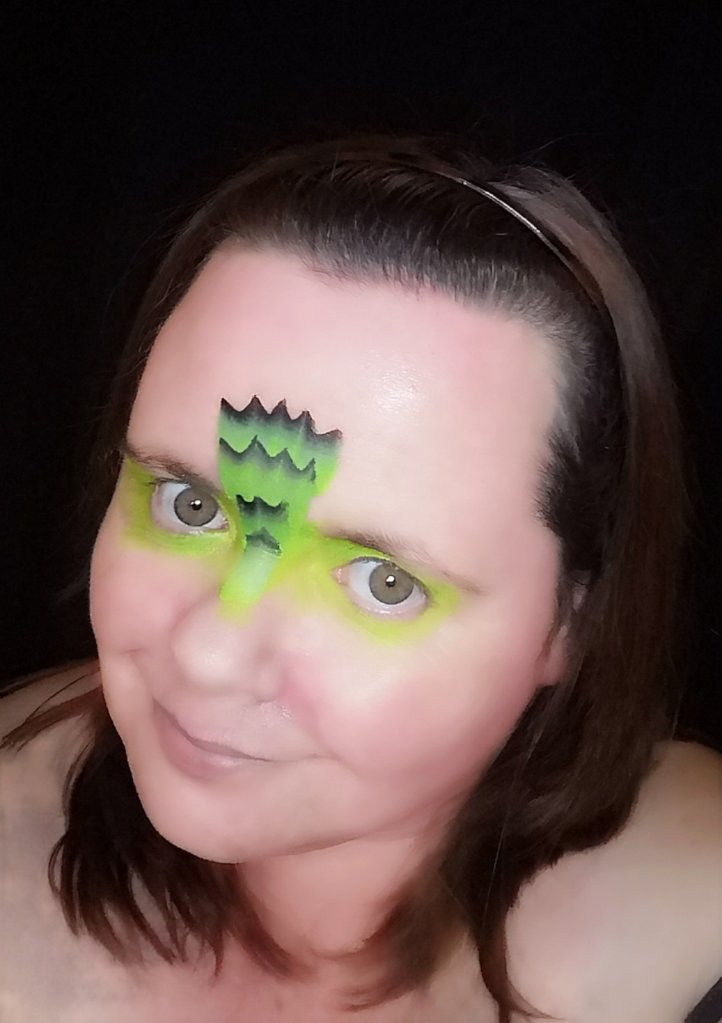
Step Two; Focal Point
I then use the green one stroke in the Rainbow Pallette from fusion. I prefer a longer bristle brush, so would use the 3/4″ long bristle angle brush for application. Activating the paint and obtaining the optimum amount if paint on the brush is paramount. All individual colours need to be clearly visible, usually coming up to 3/4 of the way up the bristles. Starting from the top, work inwards, creating Us overlapping to create the focal point of the design.
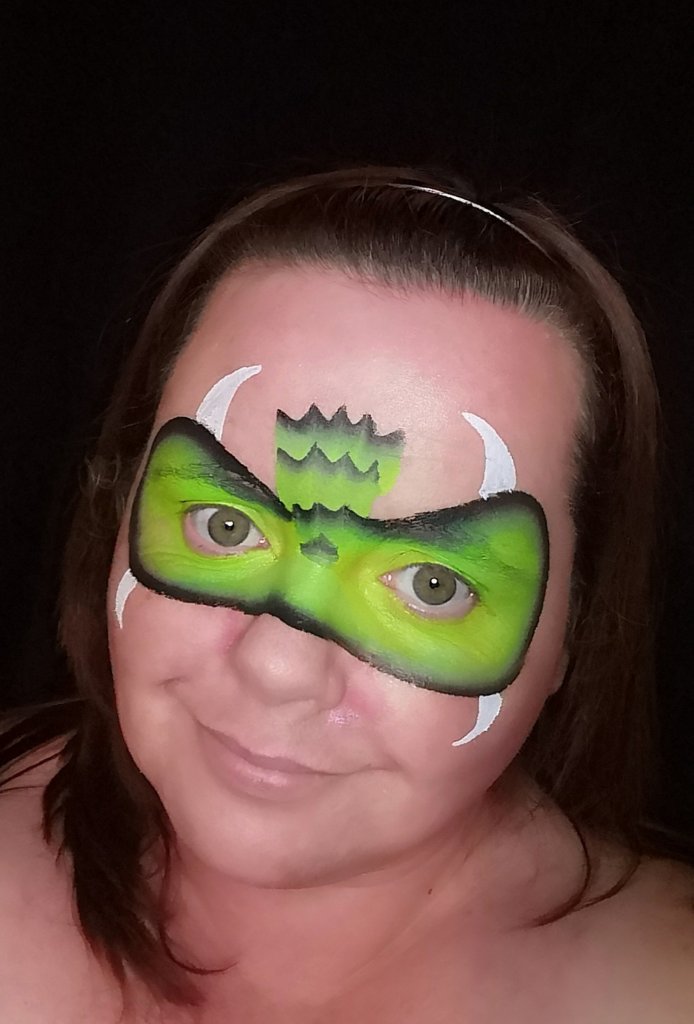
Step Three; One Stroke Outline
Using the darker colour of the onestroke on the outer edges saves us time on the job, often allowing us to skip outlining completely!
Starting at the focal point, between the eyebrows paint around the eyes as above. Ensure the darkest colour is facing outwards and I personally use the eyebrows as my guide. The allows me to be quick and effecient, whilst maintaining good symmetry. By keeping the darker colour towards the outer edges, outlining in black becomes more of a choice than a necessity. If your queue is heaving and you’re feeling under pressure, it’s one step you can skip!
Step Four; Horns
Depending on the age and cooperation of your model you can limit the horns to just the two at the top.
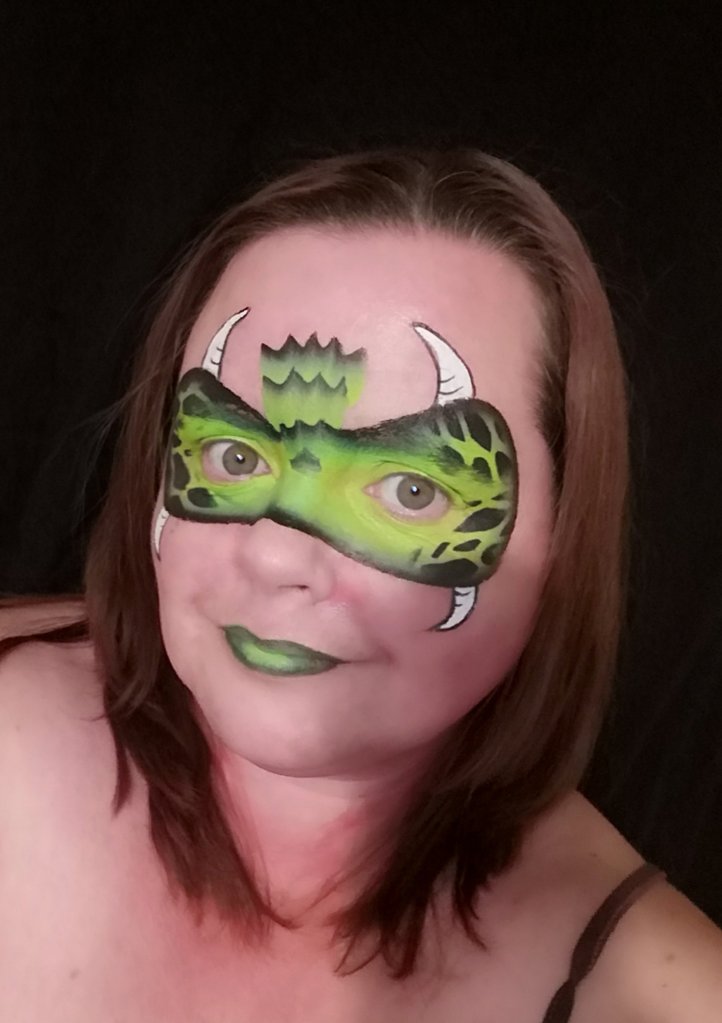
I use the number 3 round brush from The Facepainting Shop’s #pinktips range, to paint the horns. Paint consistency us key here, ensure you have fully activated your paint, I tend to work the water into my paint until I have the consistency of melted ice-cream. I then begin at the tip of the horn, on the very tip of my brush and as I curve down towards the mask I’ll increase the pressure I use on my brush, causing my line to become thicker, I repeat this on the other side of the horn to create a horn that has a crisp point with a thicker base. If you find you’re pushed for time or the child in the chair is not sitting well, you can simply paint two horns, which will still look great, giving a balanced and professional design.
Step Five; Finishing Touches
Adding a few finishing touches can take a design from merely a mediocre design to a memorable one. Think carefully about what you add!
I use a reptile scale stencil, with alittle of the darkest colour from the edge of your one stroke. I apply this using a finger dauber. I know many beginner painters who are nervous of stencils, often fearing by adding them they’ll ruin the whole design. They experience bleeding of colour or smearing. I too used to have the same issues! I found once I discovered finger daubers and got my paint consistency more on the dry side they worked fantastically!
Work Smart, Not Hard!
Often on the job, we can easily begin to feel overwhelmed and out of our depth. The queue feels a mile long and every other parent is demanding or insistent you try to recreate a 3 hour design from Pinterest in 3 minutes. It’s important during these times that you take a moment to reassess your situation. Many of these designs I’m sharing with you are easily adaptable for such occasions. You can drop down to 2 horns, or even miss out the scales if you’re really pushed. By using a one stroke with a darker edge, you are literally outlining as you paint! Outlining just the horns will also save you precious moments. I’m sure many of us will be rusty when we return to facepainting, but often that nervousness and anxiety falls away with the more faces you paint, I promise!
We’d love to see you’re attempts at any of the designs we’ve shared. Please feel free to share in our Facebook group or Instagram page.
Many professional Face Painters have found themselves with paints nearing their use by date, this blog walks you through some great products, that will help you create some great designs whilst watching your budget! Newer painters will hopefully find this particulary useful in choosing some solid products that will become essential in building your business!
The Facepainting community is one of the tightest, supportive and friendliest bunch if people I have had the honour of being part of.
We’ve been so supportive of each other, praising someone’s post or design, lending an ear to an artist who is in the verge of selling their kit and offering their advice when needed. This includes the year of 2020. We’ve been able to support each other even though COVID-19 has literally bought the whole entertainment industry to its knees. Many of us have had to seek “real employment”.
As the days turned into months it began to dawn on many of us that when we return that alot if not all of our kit will be out of date or nearing it’s use by. Now, for the amateur or hobbyist this isn’t a huge deal, I can shamefully admit I’ve a few mascaras and eyeliners that are probably older than my youngest child……. (psst I used one only yesterday!! 🤮) But, as professionals, we must use products in date and as specified. If we don’t, we invalidate our insurance. So, we face a problem. We need to work to make money, but to get work we may need to spend money!!!
I’m writing this blog to help established painters choose a select few items which, if used correctly can be incorporated into enough designs to get you by the first few months. Even new painters and hobbyists will be able to take the information here and build up a professional kit. I’ll be following this blog up with some designs using these items and step by steps to help create them.
Established Painters, We’re Not Starting From Square One!
This is important to remember. We’re not starting from square one! We have items that are part of our kit which have no use by date. Items which we can use safetly in a world where I fear COVID-19 may still be lingering in the background. We have our chairs, tables, banners and cases. All items, which we’re hard to get. These are still an important part of our kit. Ofcourse, if you are a new painter, these items are available from http://www.thefacepaingshop.com.
Paints You’ll Use Most
I’ll be recommending some specific paints to kick-start your kit. The paints I’ve chosen are for specific designs I have in mind. Now, it’s so important not to browse through looking at beautiful colours and choosing them because you like the look of them! You need to ask yourself, what designs can I create with this cake? If you can come up with one then great, but if you come up with two or three that baby needs to get in your basket!
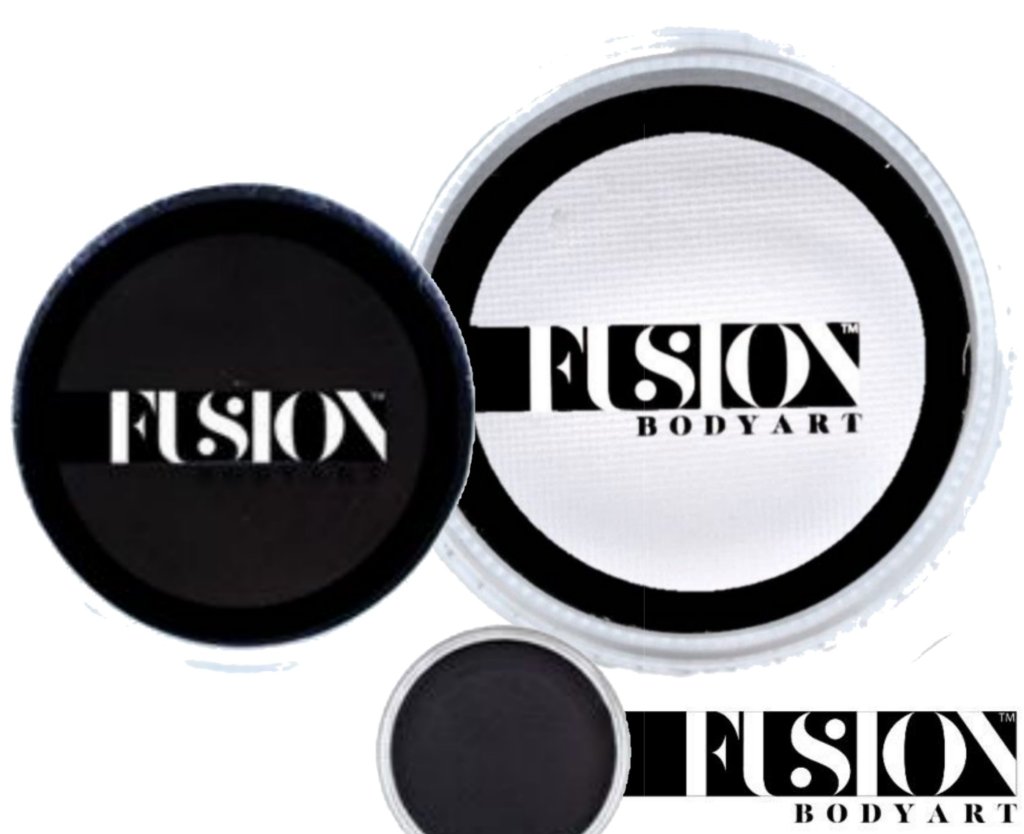
My first recommendation would be a good black and white. Preferably wax based for line work. I personally love Fusion white and black (32g) for bold linework.
As Fusion is a waxed base paint it’s great for outlining and sitting ontop of bases.
I’d recommend perhaps 4 Superstar paints for bases, these would be for spiderman or shimmer base to lay down a few flowers. I like Superstar as their consistency isn’t as heavy as some paints. I’d purchase a Green (16g), White (16g), Red/Valentine Shimmer (16g) and Glitter Silver (16g). Although they are only 16g, they go along, long way I promise! Here are the following links to each paint as listed.
Superstar is a great choice for that perfect base. It’s so soft and light and blends beautifully.
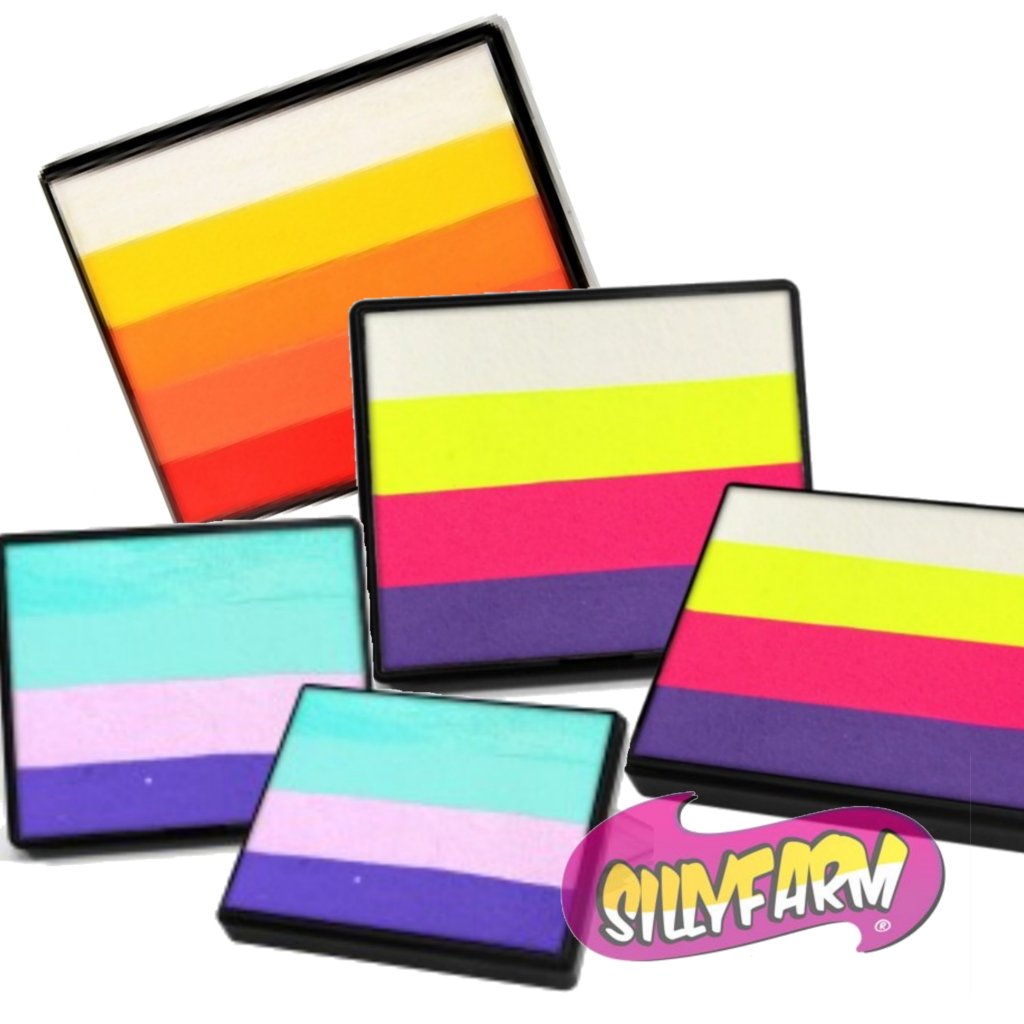
The Facepainting Shop offers many, many, many beautiful split cakes. All fantastic for bases for anything. At the moment I’m concentrating on Butterflies and Tigers. Ofcourse, masks and eye designs would also be covered! Remember; one design great! Two or three designs…… Perfect! I’m a huge fan of the large Rainbow split cakes, from Silly Farm. The Facepainting Shop carries a huge selection, which can become overwhelming (in a good way!!), so I’ve chosen 2. I know….. I know….. At this time I carry at least 8 to 10, but I’ve tied it to 2, with Paisley getting an honourable mention as its so versitile for butterflies and tigers, especially if your working to a winter theme. I’ve chosen Pink Lemonade and Tango. Both perfect for butterflies and tigers. The links for both are listed below.
There are so many beautiful split cakes sold by The Facepainting Shop it really is hard to narrow down your choices! Remember though, if you have solid colours you can always load your sponge using those!
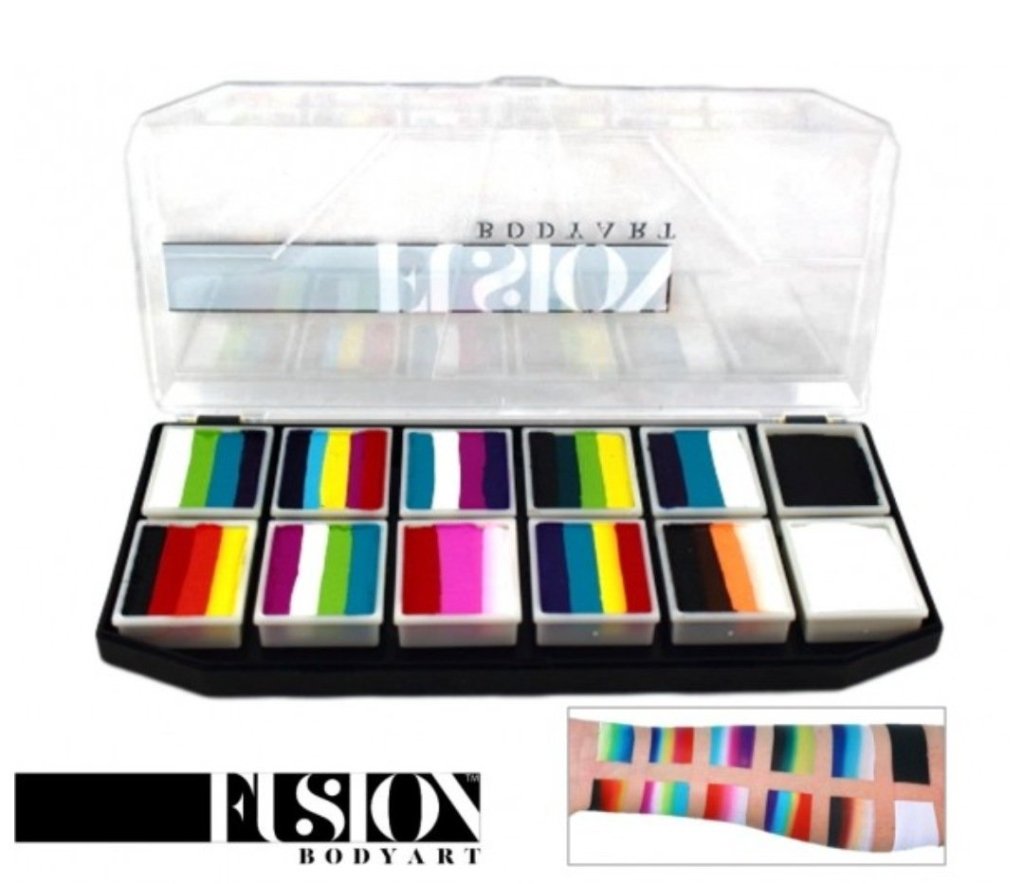
I’d also recommend The Fusion Art Rainbow Explosion Pallette. It’s full of onestrokes, okay not full size ones, but enough to get you through a few gigs! The onestrokes it has are ones you’ll use though! You’ll be able to create Roses and other flowers, Rainbows, Teddy bears, Reindeers, Frozen Crowns, Sharks, Dolphins, Snakes, Dinosaurs, Dragons, Leaves and Flames. That’s just off the top off of my head! Here’s a link for the pallette.
This pallette is a great investment for seasoned professionals and newer painters. It’s got such a wide variety of onestrokes in, which you can utilise on the job. I’ll be following up with some designs using these colours soon!
Remember to keep an eye out for my next blog where I outline the designs I’ll be offering using these items. I’ll include some step by step pictures to help newer painters.
Starting From Scratch – Brushes
As an established painter with a brush fetish, I’m confident that when I return to Face Painting I’ll have enough brushes to implement a rotation system, where I can have a set of brushes “deep cleaning” whilst I continue to paint. Ofcourse, there will be newer painters who will need to purchase new brushes.
In my opinion, brushes are very much like men. They’re are really nasty, cheap and flaky ones out there and they’re some beautiful, smooth, well made and durable ones that actually do what you ask them to do! It’s all about finding them!! 😂 When you do find them, you look after them, you love them even. You clean them and condition them, laying them down on a soft fluffy towel to dry, ensuring the bristles are all pointing the right way and are all in tip top condition. You even take pictures of said brushes to make your painty brothers and sisters jealous!!! So, where are all the good men?? Oooops…. I mean brushes 😂😂
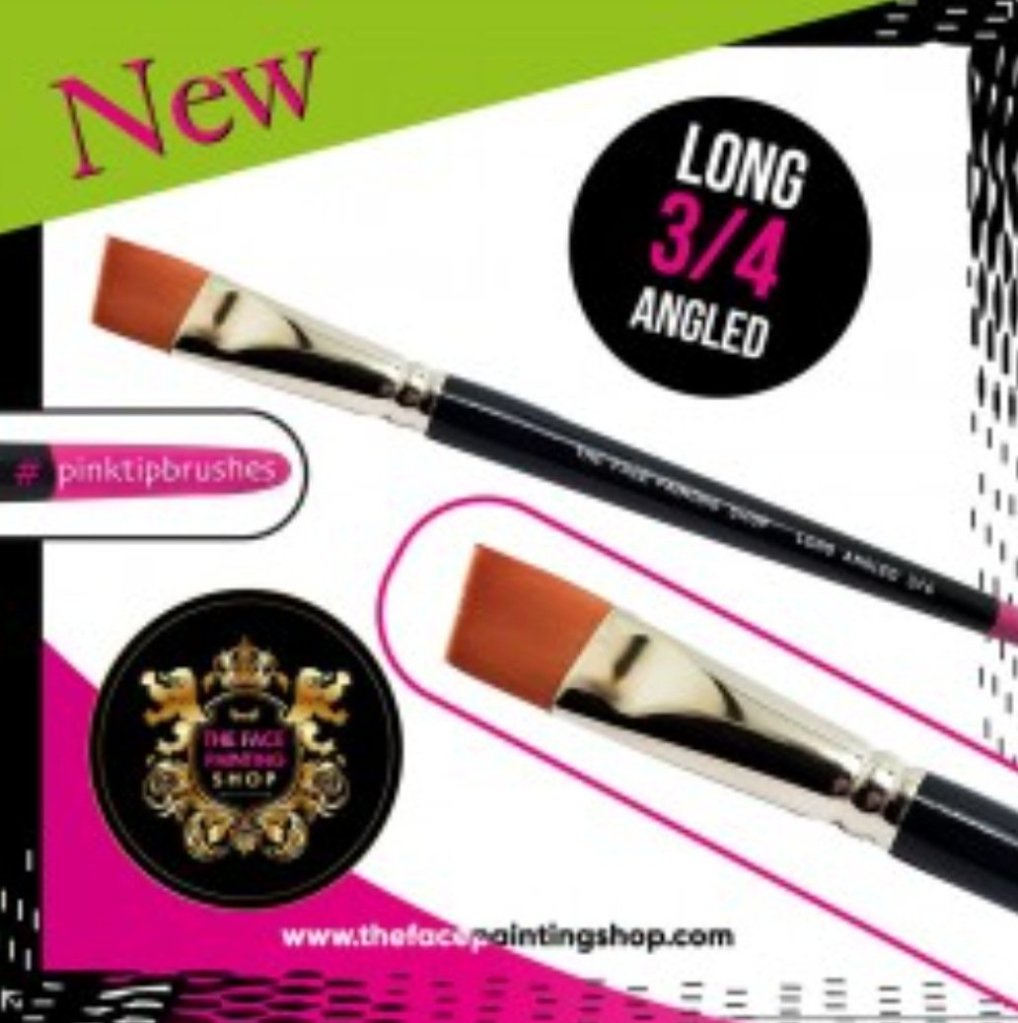
I’m particularly fond of Natalie Davies brushes for onestrokes. For an experienced painter you can’t really go wrong with her long bristles. That extra length is a great asset. Less reloading on the job, more movement in the bristles, it all comes together. Ofcourse, The Facepainting Shop have created their own long bristle brush for one strokes. This one is particularly exciting as its angled & 3/4″. I know many painters who prefer an angled brush over a flat one. As I already stated, the extra length does help create some fantastic strokes. Below is the link for this great brush.
This brush is fantastic for onestrokes. The longer bristles will help you achieve some fantastic strokes! It holds so much paint, it’s unreal! Ofcourse, we’re desperately trying to only load our brush once, and for me, this will be a game changer!!!
#pinktips
I’ve a large selection of what we call “pink tips”. There’s even a hashtag for them! The most famous brush from TFPS is the short 3/4″ angled brush. These, in my opinion are perfect for newer painters. The shorter bristles mean you have more control to create the strokes you need to to complete these designs. They’re easier to load, which makes them perfect for a newer painter experimenting with onestrokes. I also use many of TFPS round brushes. Many of my cartoon designs are outlined using #0 round pink tip.
Look After Your Brush!
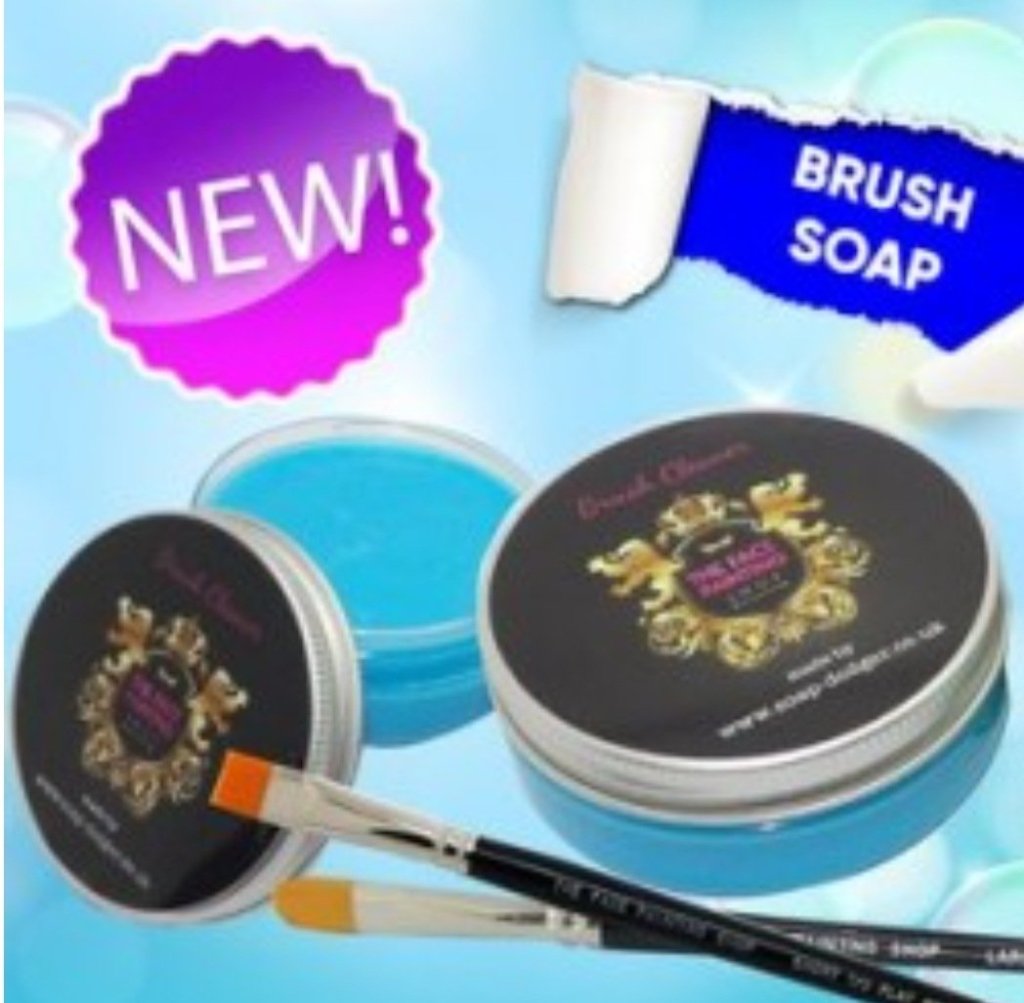
It goes without saying, if you’ve spent as much money on brushes as I have you need to look after and clean them correctly! There are many wonderful brush soaps on the market, which are specifically designed to remove facepaint from your brush whilst conditioning the bristles and helping to reshape and keepin shape your bristles! I’ve read many new painters using artist’s soap to clean their brushes, which may sound good in theory, but can lead to alot of issues. These are not designed for facepainters. Artist’s brushes should never touch the skin, so therefore the ingredients in these soaps are not the same. Many contain microplastics, which strip the bristle of the paint, often leaving behind abrasive microplastics which can then be transfered to the skin.
Here’s a link for a great brush soap. This will ensure you brushes are not only clean, but we’ll looked after! Remember after washing to take the time to reshape your bristles and lay on a flat surface, if you store them with the bristles facing upwards you risk the water running down the brush and loosening the glue that holds the ferral to the handle!
A good brush soap will extend the life of your brushes! Using the correct soap is an absolute must.
Stencils…….. No Use By Date!
Established Painters will have anything from 5 core stencils to up to a 100!!! (I’m shamefully in the last.) Our stencils are reusable and durable. Designed specifically for the face, there are no sharp edges or rough sides. Stencils add interest to any design, and often when layered ontop of a smooth base can look incredible. There’s a technique to using stencils, so if you have had bad experiences in the past please look up stencil tutorials. I would never be without mine. The Facepainting Shop has a huge choice of stencils from many different companies. I have a core group of stencils, which I keep on a lanyard around my neck during my gigs. It’s so easy to mislay a stencil! I have; Dots for interest and shading, Minecraft, Fortnite, Mandala, Snowflakes, Mermaid Scales and a Fairy Shillouette. These will be used in my next blog, Designs to Reboot with.
Here’s a particularly great stencil for adding detail to Spidermans eyes, and other superheros. The descending dots really do add that extra bit of interest that lifts your design from hobbyist to professional.
Again, we’re lucky. (I know right who’d have thought!!! 😂) Most of us have glitters which will be OK when we return. Maybe not biodegradable ones in a mix though. Quite honestly, many established painters have too much glitter. I personally have a revolving spice rack full of colours, and Lord knows how much in pots tucked away! In all honesty, a new facepainter would need silver, gold and iridescent fine glitter for puffing over bases and the same again for chunky glitter, to add interest to designs.
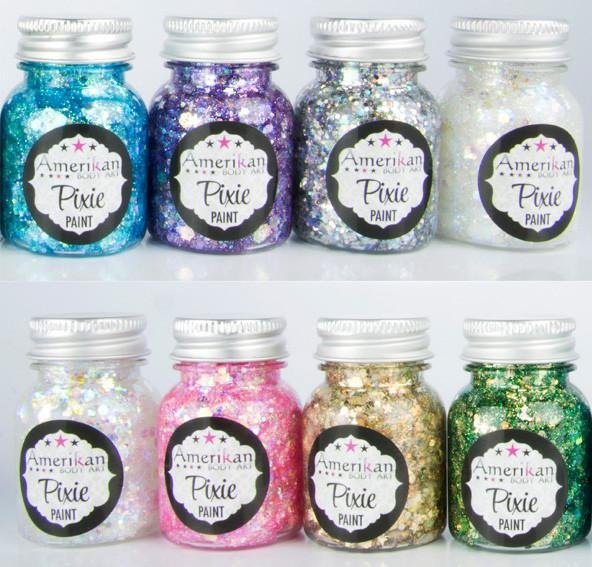
As your business grows you’ll buy more and different colours, trying out different brands and makes. If you expand out into Glitter Bars you’ll have an absolute ball choosing from the abundance of glitters The Facepainting Shop stocks! A particular favourite among many painters, is Pixie Paint. A Unique blend of glitter and adhesive, which makes it so easy to use on the job! A quick swipe with a silicon brush and viola! Job done! Below is a link to the Silver Pixie Paint.
These are so easy to use and glide on the skin like a dream! They are an absolute must for any Glitter Bar.
Don’t forget to keep an eye out for my next blog, where I actually show you how to use these items. Once we return, we need to keep our designs down to 10 to 15, whilst using the items listed on this blog. Ofcourse, as we begin to earn, we’ll be able to reinvest back into our kits and begin to flex those creative muscles some more!
We’ve got this, it’ll soon be our time to shine again! Much love, Rachel xx
Hi, I’m a professional facepainter with over 10 years painting experience.
So, within the past week, the Coronavirus has gone from looming in the back of our minds to taking over our every waking moment. But, what does that mean for entertainers, such as face painters? Do my clients need to worry?
The Coronavirus is currently at the forefront of everyone’s mind. Being careful and stringent will go along way to keeping you healthy.
I’ve always followed strict hygiene standards. As a professional, I use a clean sponge for every child, never redipping it into my paints. I use disposable brushes if I paint children’s mouths and I rinse and change my brushes regularly. I won’t paint a child who has any open sores or signs of infection, due to the contamination risk to my kit.
Most professional facepainters have invested thousands of pounds into their kits, and take cross contamination seriously! No kit, means no potential to earn.
Ofcourse, the Coronavirus takes up to 14 days to show any signs in the host. We could potentially paint Timmy on day 2 of the incubation period, without realising until 12 days later that we’ve been in contact with a carrier.
So, there are things we can do as professionals to minimise the risk to our clients. This is why it so very important to hire a professional over a hobbyist painter. We have stringent routines we follow
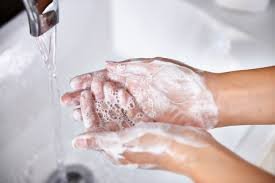
It is important to use soap and water, not just hand sanitiser. When washing your hands you must wash for at least 20 seconds (or two rounds of happy birthday-so great for the little ones!!)
Things We Plan To Do To Keep Our Clients Safe
Destination handwashing. What we mean by that is we wash our hands before we leave our homes, and upon arrival at the venue we once again wash our hands. Once we are set up and ready to paint we again wash our hands.
I personally do not use public transport, as I carry a large kit.
I use my own table and chair, which I wipe down with antibacterial wipes before I set my kit down.
I use a clean sponge for EVERY CHILD. (This has always been my practice.) I never redip my sponge into my paints. I clean my stencils and brushes between clients and I will refresh my water regularly. I will not paint children who appear ill or have any open sores or rashes on their faces.
Once I’ve finished. I will wash my hands and pack up ready to leave.
At home I wash my equipment thoroughly. My sponges are washed on a high heat in the washing machine and then dried thoroughly. Insuring my kit is ready for the next party.
Should You Cancel Parties or Holidays?
At the moment, 3rd March 2020, the government are advising that you continue with your day to day activities. See the below link:
As long as we’re all following the advice and washing our hands regularly, we’re doing the very best we can. We’ve seen this happen time and again in history. A decade ago it was swine flu and the issues surrounding that. Right now, we need to be sharing the CORRECT information on how to tackle this and stay safe. Social media is a hotbed of misinformation and opinions, if in doubt always refer back to your government website.