A Step By Step Guide.
The Butterfly is by far, the most requested design you’ll ever paint, so getting it right is important. Being able to paint it quickly and effeciently is crucial if you wish to grow your business.
Placement is Key
What ever butterfly you decide to paint, placement is crucial. Alot of painters often struggle with symmetry and getting the wings balanced. I’ve a few tips to help you overcome these issues. I was told many years ago that if I found it difficult to get my butterflies balanced, I should paint my weaker side first. That way I’d be able to replicate that without any issues! So, if I was right handed, I painted the left side first, that way I could replicate that side with minimal issues. I followed this for many years, and found it a huge help.
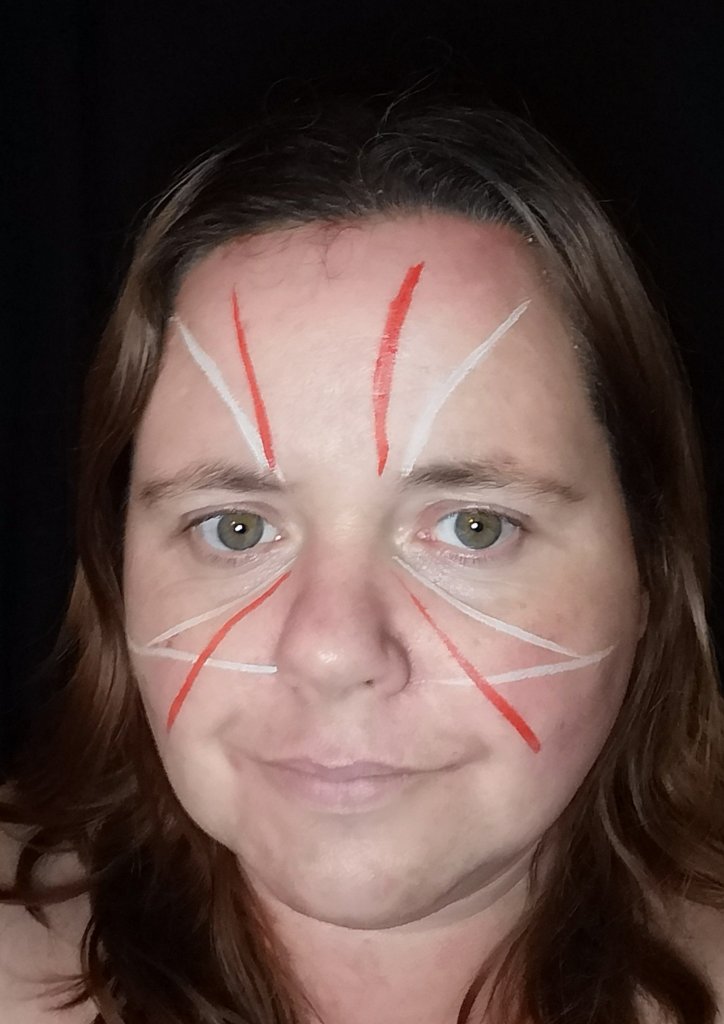
Errors We ALL Made!
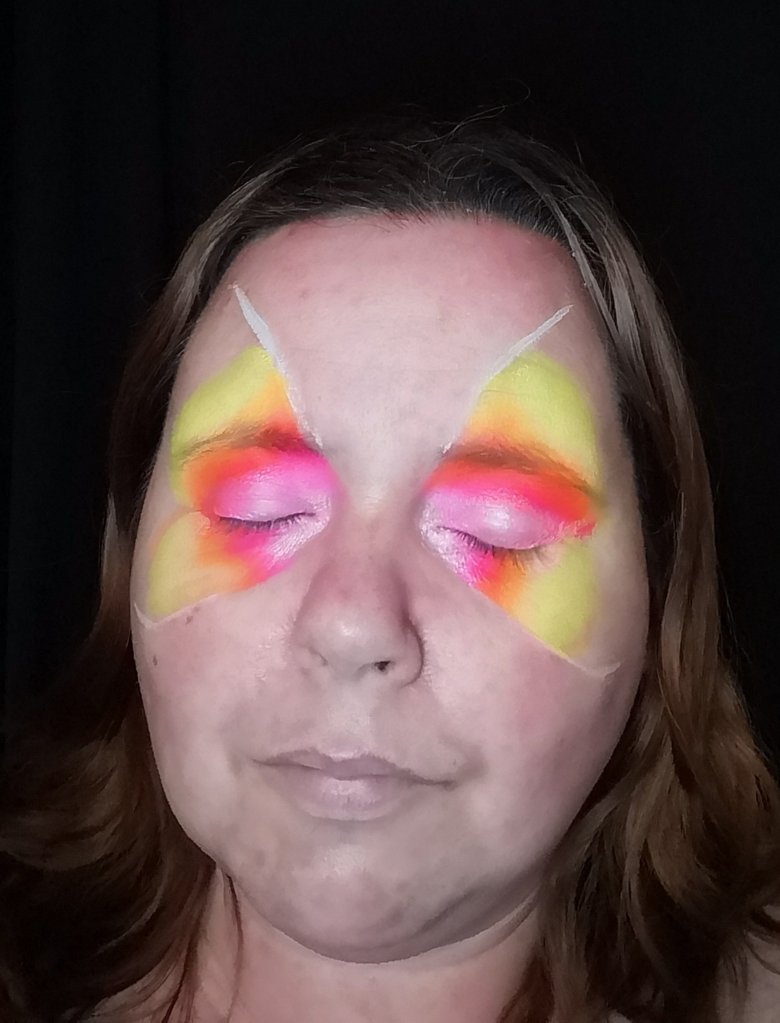
If you look closely at the picture above, you can see some simple errors we’ve all made when first starting out. The red lines indicate where a beginner painter may place a butterfly. A rule of thumb with butterfly layouts, is each top wing begins from a focal point at the centre of the face, at the bridge of the nose. The wing will then go from this point at a slight angle, gently passing the edge of the eyebrow. Not, in the case of the red line, where it is a more severe line upwards, without the gentle slope.
The bottom wing, needs to be smaller and quite tight in comparison to the top. We again, start from our focal point with a gentle line, finishing on the apples of the cheek. Many make the mistake of bringing the bottom wing down more, almost in line with the lips. As you can see, from my guide lines, my bottom wing finishes almost in line with my nose. This will help you create a far more delicate butterfly that doesn’t cut the face in two.
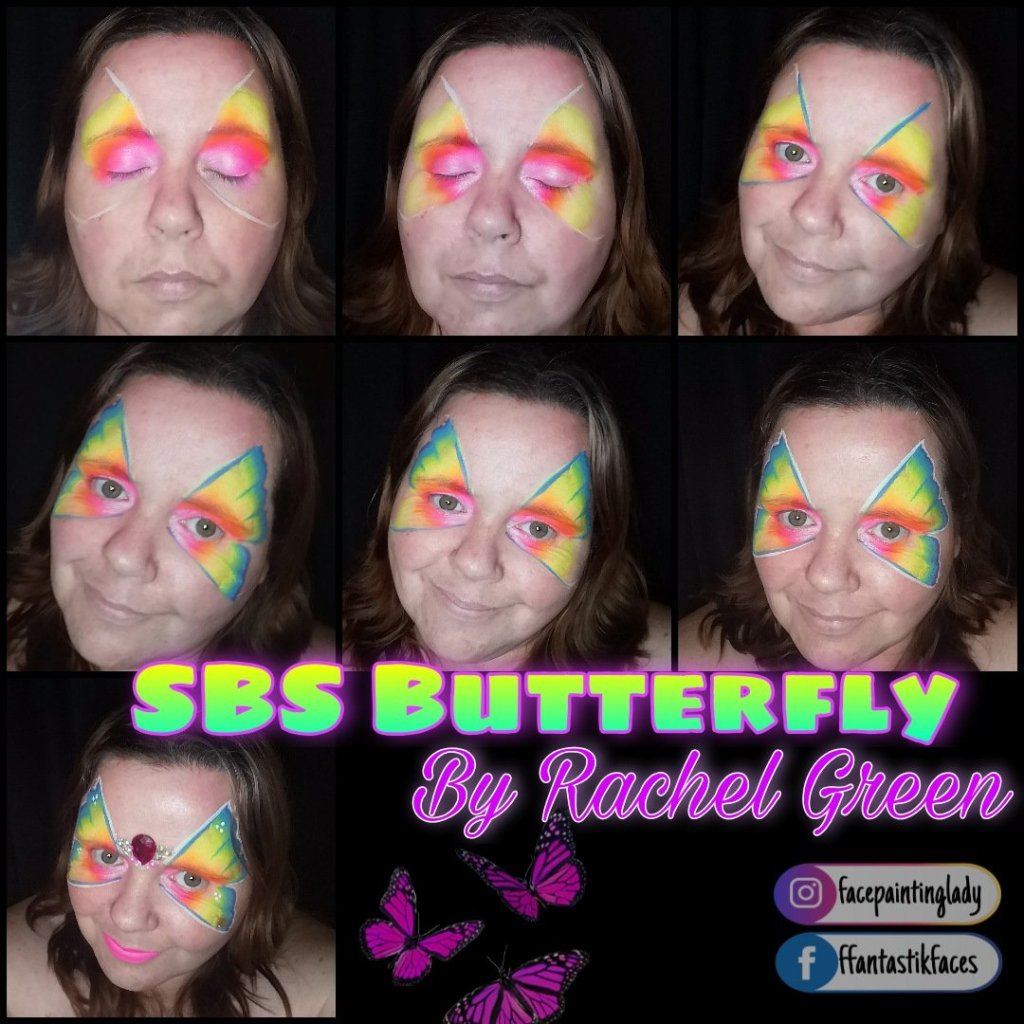
Step One; Top Wings
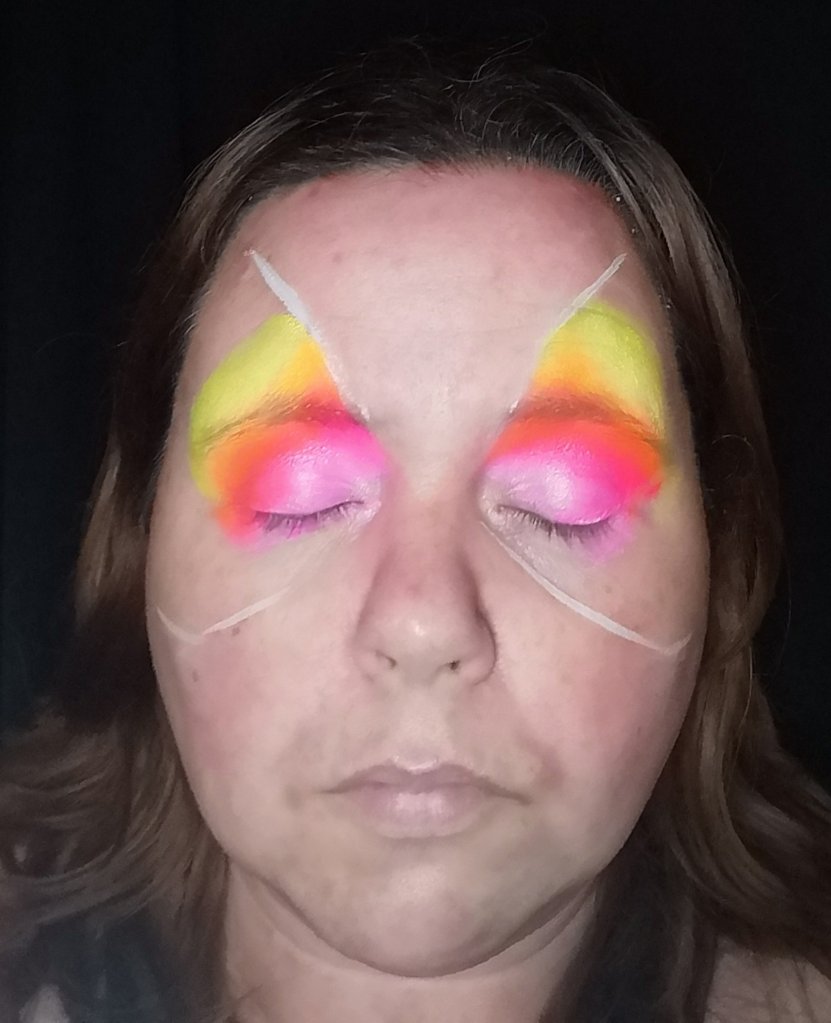
As I stated previously you can quickly sketch out the positioning of your wings, this helps you keep you design balanced easily. Don’t worry about what your client or on lookers think, it’s what works for you!
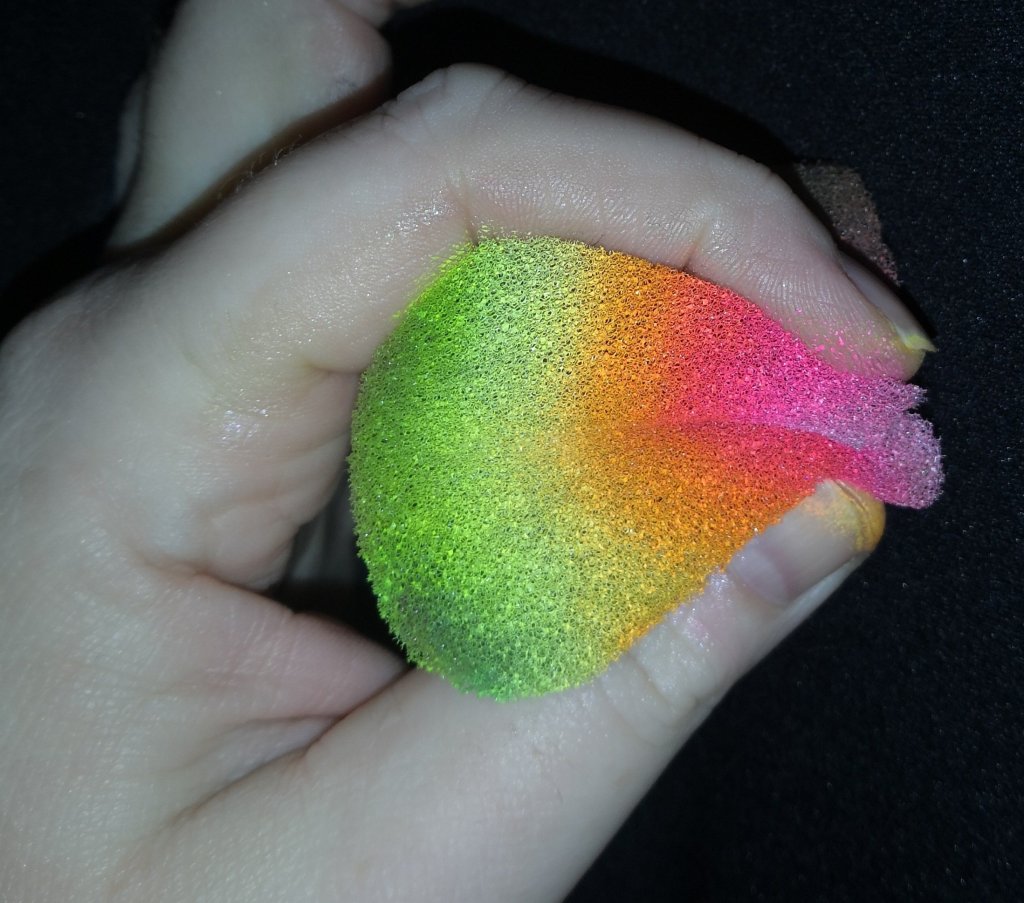
Using a bold split cake, you need to successfully load your sponge. You can use petal sponges if you prefer, or cut up baby sponges work well too! I spray my sponge with water, ensuring its damp, but not overly wet, I want my paint to look opaque and bold. I gently dab the sponge onto the clients face, keeping in my guide lines. I like to keep a lighter colour on the inside, with darker on the outside. But this can be flipped! One split cake can create many fab looks by simply flipping your inside colour!
In my previous blogs I’ve listed a compact kit to restart (or start! in some cases) with. I’d use SillyFarm’s “Pink Lemonade” to create this design, which is available here, at The Facepainting Shop :https://www.thefacepaintingshop.com/Silly-Farm-Rainbow-Cake-Pink-Lemonade
Step Two; Bottom Wings
As I stated, the bottom wings are alot smaller and delicate, compared to the top wings. They begin at our focal point and end on the apples of our cheeks, almost level to the nose. This us where the petal sponge becomes invaluable. So easy to load and dab! But, if you don’t have any petal sponges available, you can load your sponge as normal, and simply pinch the corner which will be closest to the focal point. This creates a beautiful, delicate bottom wing
Step Three; Outlining
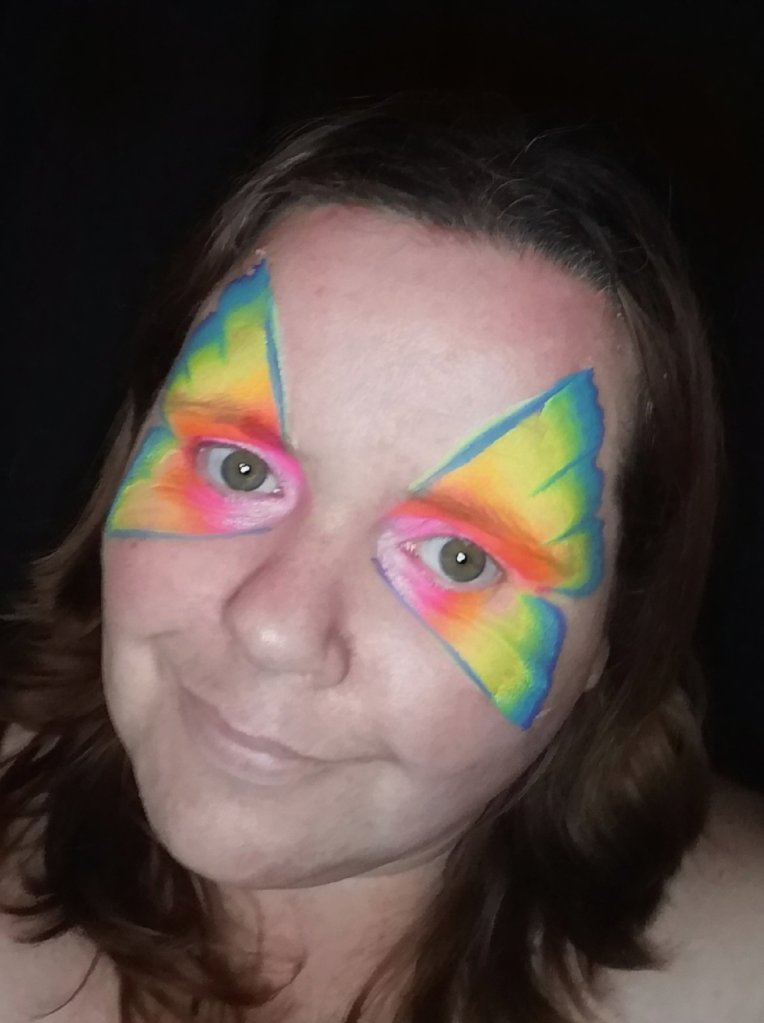
Now the wings are complete, we can outline them with a quick onestroke or a bold colour. I prefer to use a one stroke, as I feel it can add extra depth and interest. You can use the Fusion “Rainbow Explosion Pallette” here and choose a onestroke to compliment your split cake.
Load your 3/4″ long bristle angle brush, being careful to not flood the cake. I tend to submerge my brush with water, then run the bristles on the edge of my water carrier to loose the excess water. I find it’s much easier to add a little water to my brush than to fix a flooded cake! Once my brush us loaded correctly, I will paint over my guide lines. To do this I will use the brush in a cutting motion, using the side to create that thin line. By using the brush in this way, we a minimising the amount of brushes we’re using in one design, thus keeping the design quick!
Once I created that line, I will then outline each wing, using the whole width of the brush to create a two tone outline. Always keep the darker colour on the outside as this cuts will outline our wings! The top wing, we usually seperate into 3 distinct sections. They’re usually staggered, often tightening into the corner of the eye. Different artists have different techniques of creating these 3 segments, so it’s worth studying other’s work to see what you find more pleasing.
The bottom wing is outlined in much the same fashion, except this wing usually has 2 definite sections. Again, many painters have different finishing flourishes here, some with add curls and other embellishments. Take at look at your favourite artist’s and try to work out what they’re doing to create interest and texture!
Step Four; Finishing Touches
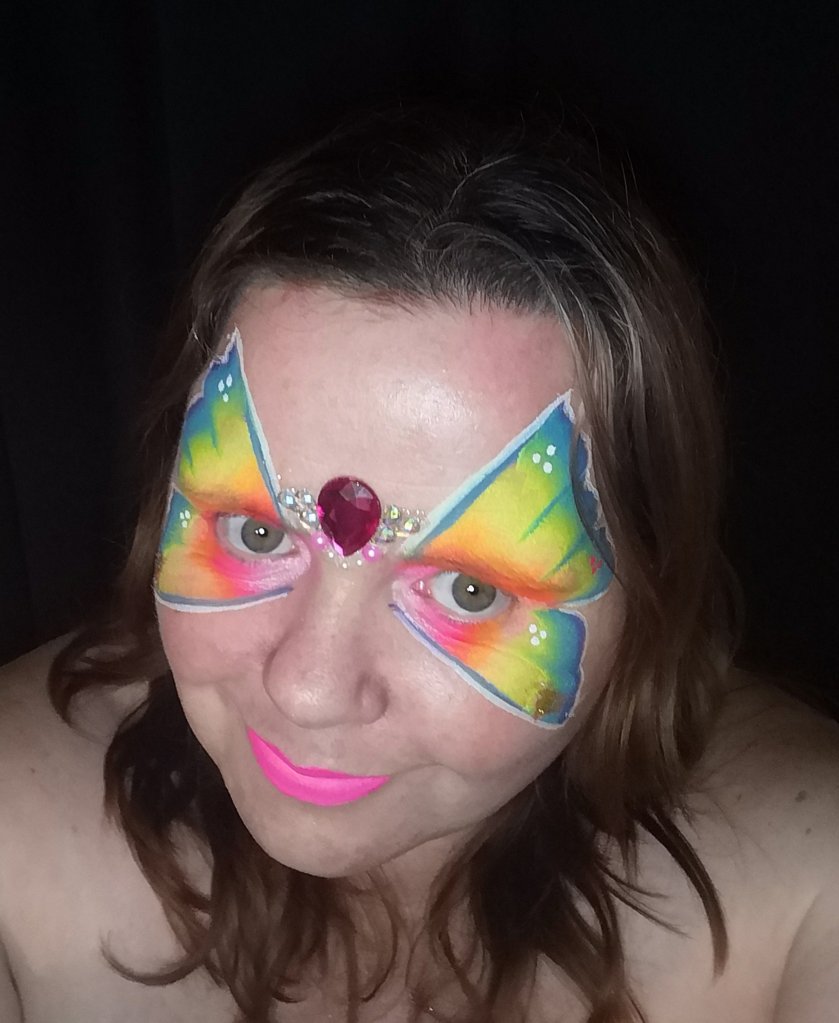
By now we can clearly see the butterfly we were hoping to achieve. If I was at a busy festival with a line 30 deep I’d be sorely tempted to add a body, antennae and a Puff of glitter! And that would BE OKAY!!! It’s important to know we can do this when we need to. But, if I was at a private birthday party, and this was the birthday girl I’d be wanting to add some embellishments and finishing touches.
A quick outline with fusion paraffin white can really make your design pop and stand out. This process is alot easier to do than it sounds. The key is using the correct brush and having the paint and the right consistency. Using a liner brush with an inky consistency means you can outline quickly and effortlessly. A few white dots on the outer edges of the wings also helps break up the design, really lifting the already bright colours.
A little glitter and a gem centre piece will lift your design to another level. I often tell the little one that the gem piece is reusable and they could use it on their dolls (if they’re small) or the older children I suggest they pop it on a photo frame. This then ensures my gem clusters are reused!!
On the job, I try to not paint lips. This is mainly due to hygiene reasons. Although 9/10 little ones are eating and drinking too, so it will be smudged on minutes! Even so, I guarantee you little girls want lipstick! To be hygienic, you’d need to use a disposable brushes. I always carry some cotton buds, then I can just dab these on the children’s lips instead and simply dispose after. On a side note, I also carry kirby grips. (100 for £1) as its sods law that the girl with biggest fringe wants to be a princess!!! I went through so many headbands (I always forgot to grab them back 😂) before I realised kirby grips are cheap and easy to use. The parents are always so thankful too that you can provide a grip to keep little missy’s hair away from her facepaint.
I hope you’ve found this blog useful, please feel free to subscribe to my Instagram page (www.instagram.com/facepaintinglady) to see more designs, tips and tricks to help you become a faster and more proficient facepainter!
